Steps for User
- Connect Calendar ( All Users )
-
Connect Microsoft Teams app in Avoma ( All Users )
Steps for Admin ( one time )
IMPORTANT: Recording meetings in Microsoft Teams requires a cloud recording license. Supported licenses include Office 365 Enterprise E1, E3, E5, F3, A1, A3, A5, Microsoft 365 Business, Business Premium, and Business Essentials. For the most up-to-date and comprehensive list of supported licenses, please refer to Microsoft’s official help articles [1] [2] .
Connect Calendar
This action is required for all Avoma users who want to activate Microsoft Cloud Recording.
- To connect your calendar, please refer to the instructions provided in this article for linking either your Microsoft or Google calendar.The email address used to connect your calendar must match the one used for the Microsoft Cloud Recording integration on the Recording and Conferencing screen, as outlined in the instructions below.
- If you are using Google Calendar, make sure to install the Microsoft Teams add-on for Google Workspace. This will allow you to create and update Microsoft Teams meeting links directly within your calendar invites.
Connect Microsoft Teams app in Avoma
This action is required for all Avoma users who want to activate Microsoft Cloud Recording.
Every user needs to provide consent and permission to download recorded Microsoft meetings from the Microsoft cloud or portal. Please follow these steps for either existing or new Avoma users.
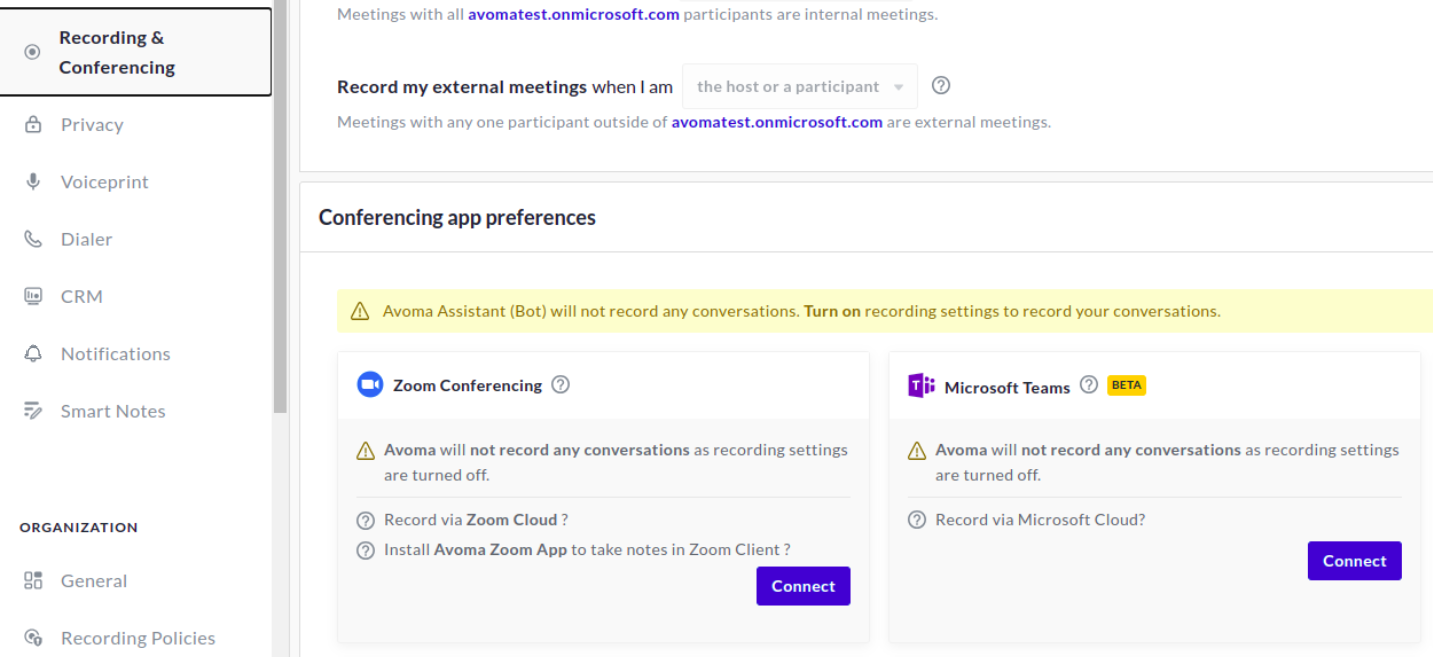
- Click on Settings at the bottom left of your screen.

- Click on Recording & Conferencing.
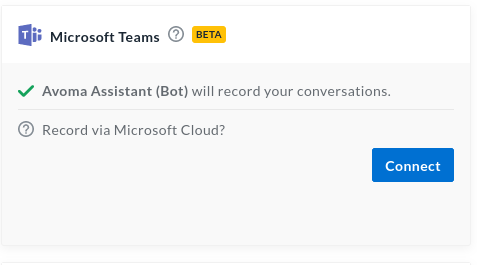
- Click on Connect for the Microsoft Teams option.
- It will pop up an authentication dialog box. Once you accept it, your cloud recording will be enabled. Please click on the checkbox that says "Consent on behalf of your organization" and then click on Accept.

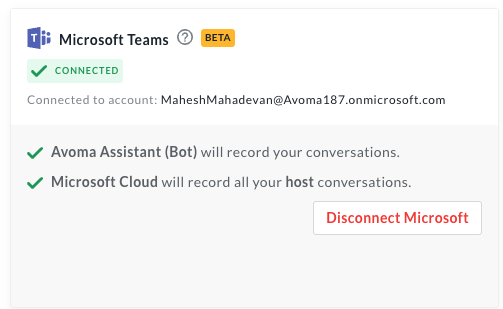
- This will show a confirmation that Avoma has been successfully connected to Microsoft Teams.
Video Guide
IMPORTANT: If you are the first Avoma user in your organization to connect the Microsoft Teams Cloud Recording app, please coordinate with your Microsoft Admin to review the following steps and ensure Microsoft Cloud Recording is properly enabled for your account.
Enable Cloud Recording in Microsoft Admin
This setup must be completed once by your Microsoft Azure Portal Admin to enable automatic recording and transcription through Microsoft Cloud Recording.
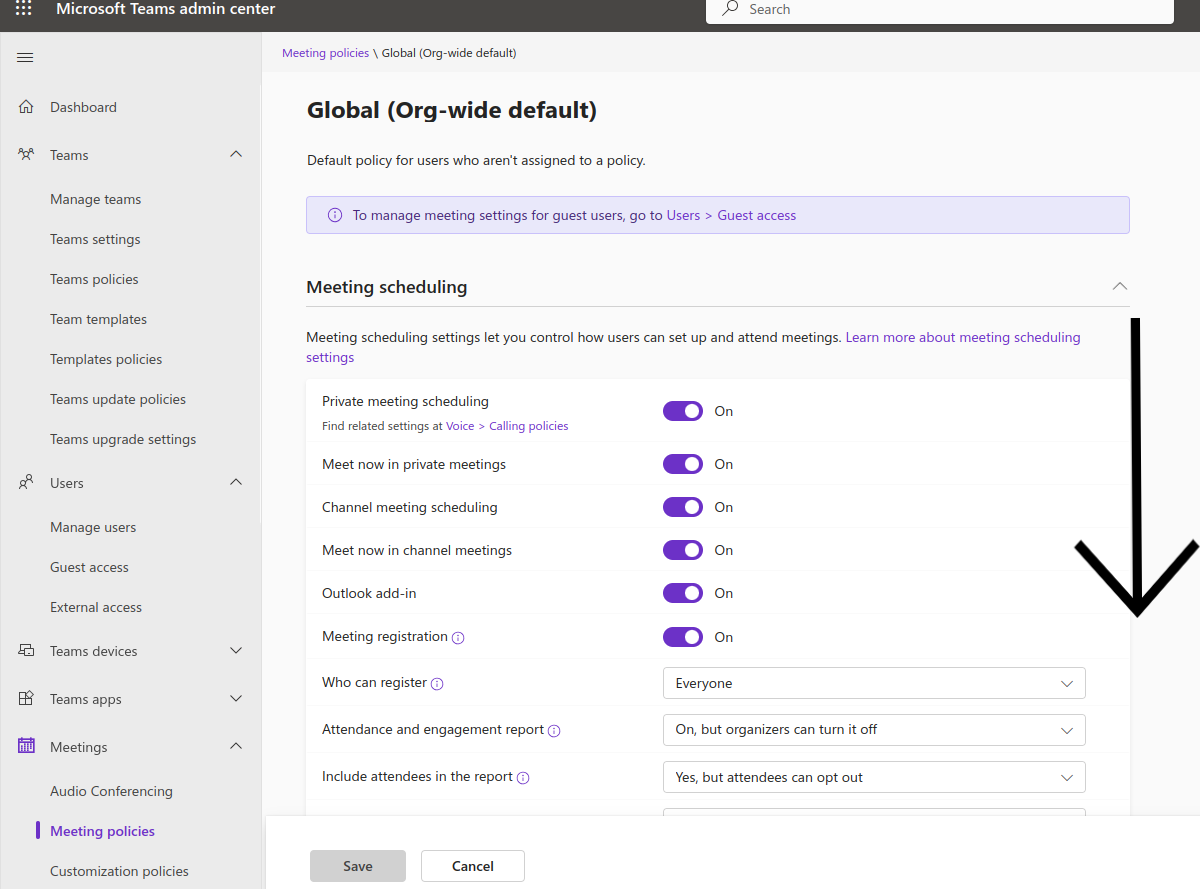
The following settings need to be enabled on the MS Teams admin panel to ensure Cloud recording works perfectly.
- Go to Microsoft Team Admin Center
- Navigate to Meetings > Meeting policies.
- Scroll down to see the Recording & Transcription option, and make sure Meeting Recording and Transcription is turned on. Once done, click on Save and then Exit.

Turn On Record Automatically
- Go to Teams Admin Center -> Meetings -> Meetings Templates
Important: You must have permissions and or valid license to update these settings on Microsoft admin page. if you are not able to access the above link, please check with your Microsoft or outlook administrator. - Create a new Meeting Template by clicking Add.

- Turn on Record meetings automatically in Recording and Transcription section. Save the Template by giving it a meaningful name.


- Navigate to Meetings -> Meeting Template Policies and ensure that the new Template is attached to Global or Org Default Policy

Microsoft's Admin Consent Workflow
This setup must be completed once by your Microsoft Azure Portal Admin to enable automatic recording and transcription through Microsoft Cloud Recording.
- Visit the Microsoft Enterprise portal
- In the left sidebar, select Applications, then click on Enterprise applications.
- Locate and select the AvomaAssistant app.
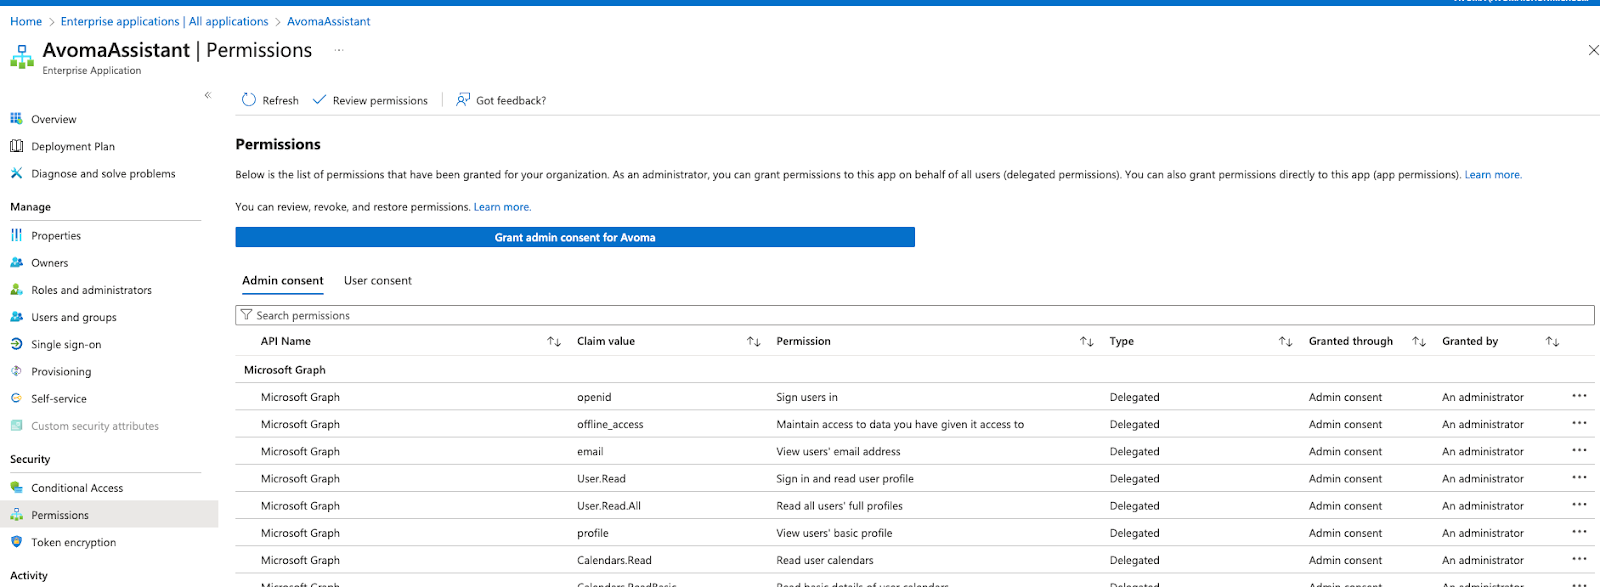
- Navigate to the Permissions section.
- Click Grant admin consent for Avoma. When prompted, select Accept in the pop-up dialog.

You will see a list view of all the permissions that have been granted.
Please let us know if you run into any issues while configuring this, you can always reach out to us at help@avoma.com, and our support team will be happy to assist you!