If you’re new to Avoma, this is the best place to start. Signing up is quick, easy, and gives you a 14-day free trial where you can experience everything Avoma has to offer. You don’t need to enter payment details upfront; just create an account, complete the Quick Start setup, and begin exploring how Avoma can help you capture, transcribe, and analyze your meetings.
Trial access
When you sign up for Avoma, you’ll automatically receive:
- Full access to the Organization plan for 14 days.
- All add-ons enabled (including Revenue Intelligence and Conversation Intelligence)
- No restrictions on features or functionality
This trial setup ensures you get the complete Avoma experience and can see how it fits into your team’s workflows before making a purchase decision.
Want to learn more about what’s included in the trial, what happens when it ends, and how billing works? Check out How does the Avoma trial work.
Steps to sign up
1. Go to the Avoma Sign Up page.
2. Create your account using your Google or Outlook work email address. You can simply choose an account or add your details.

Note:
- The email address must belong to a domain of an active website.
- Avoma does not allow sign-ups using .edu addresses or generic domains like gmail.com or yahoo.com.
- If you need an exception or have a unique use case, reach out to us at help@avoma.com.
3. Enter your details. This helps Avoma configure your account and tailor the setup to your role.

4. After signing up, you’ll be directed to your new Avoma workspace, where the Quick Start setup will begin.
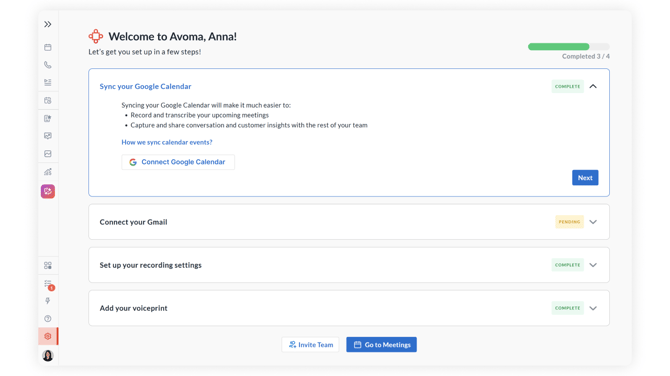
Quick Start setup
Quick Start is a guided checklist that ensures Avoma can capture your meetings and deliver insights right away. Here’s what it includes:
-
Connect your calendar
Link your Google or Outlook calendar so Avoma can access your meetings and join links. This step is essential for automatic meeting capture.
-
Set automatic recording preferences
Choose whether Avoma should record:
- All meetings
- Only external meetings
- None by default
This helps align with your team’s recording policies.
-
Choose conferencing preferences
If you connect Zoom or Webex, Avoma records via cloud recording. Otherwise, Avoma’s bot will join your meetings to record.
-
Record your Voiceprint
Read a short 30-second script so Avoma can recognize your voice. This improves speaker identification in transcripts, making conversations easier to follow.
-
Integrate your CRM
Connect your CRM so Avoma automatically pushes meeting notes, action items, and insights into the right place, no manual updates required.
For a detailed walkthrough of each Quick Start step, see our Quick Start Guide.
Payment details
No payment information is required to start your trial.
At the end of 14 days,
- You’ll be asked if you’d like to purchase seats on a subscription plan.
- You will only enter payment details at that point.
- You won’t be charged automatically when the trial ends.
To explore plans and add-ons in advance, check out Avoma Pricing.
What’s next?
After signing up and completing Quick Start, you may want to:
- Invite your teammates to collaborate in Avoma
- Learn how to prepare Avoma for your first meeting
- Explore advanced features like Conversation Intelligence
If you have a unique use case and require may special attention, please reach out to help@avoma.com to request assistance.