Creating a Group Scheduler Page
Within the Avoma Scheduler, you can create scheduling pages for groups of users within your organization based on your scheduling preferences and needs, such as meeting duration, hours available, days available, etc. To create a Group Scheduler page, follow the steps below:
- Click on the + Create New button in the top right-hand corner of the Avoma Scheduler tab and select Group (to schedule a meeting multiple people), OR Create New from the View Scheduling Pages button in the top right-hand corner of your My Meetings page.
- Fill in Event Information which describes the type of call.
- Name - Enter the display name of the schedule (i.e. "Account Onboarding")
- Description (Optional) - Write a summary and any details that the invitee should know about the event.
- Location - Specify where both parties will connect at the scheduled time. This location will appear on the calendar event and be added to both your and your invitee's calendars.
NOTE: If you select Google web conference or Zoom, this will automatically add a meeting link to the calendar invite.
- Conversation Purpose - The conversation Purpose will be set automatically for all meetings scheduled via this meeting link.
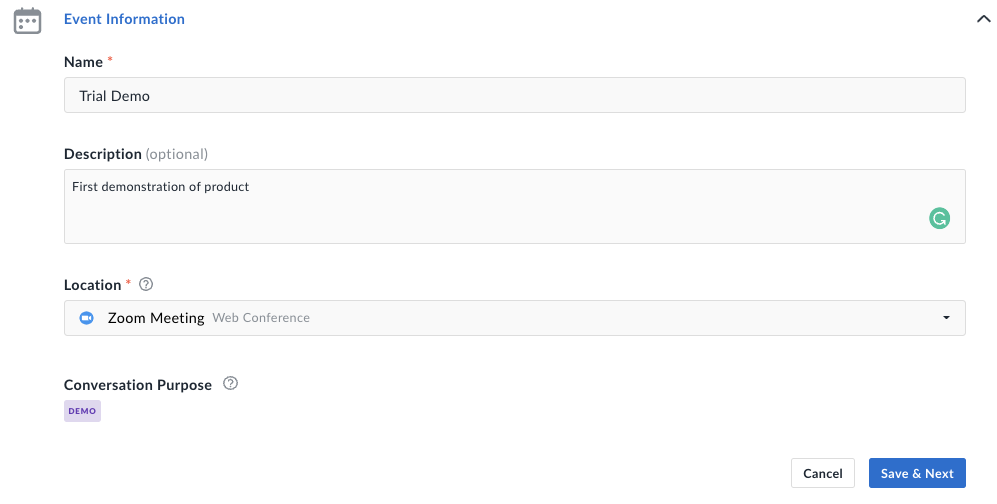
- Click Save & Next.
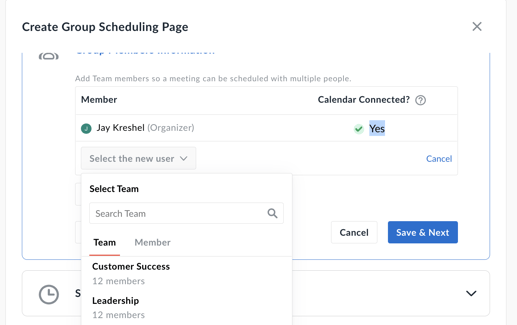
- Choose your Group Member's Information
- Add the team members you would like to be part of the group meeting. You can add additional individual members or select teams of individuals from your organization.
 .
.
- Add the team members you would like to be part of the group meeting. You can add additional individual members or select teams of individuals from your organization.
- Click Save & Next.
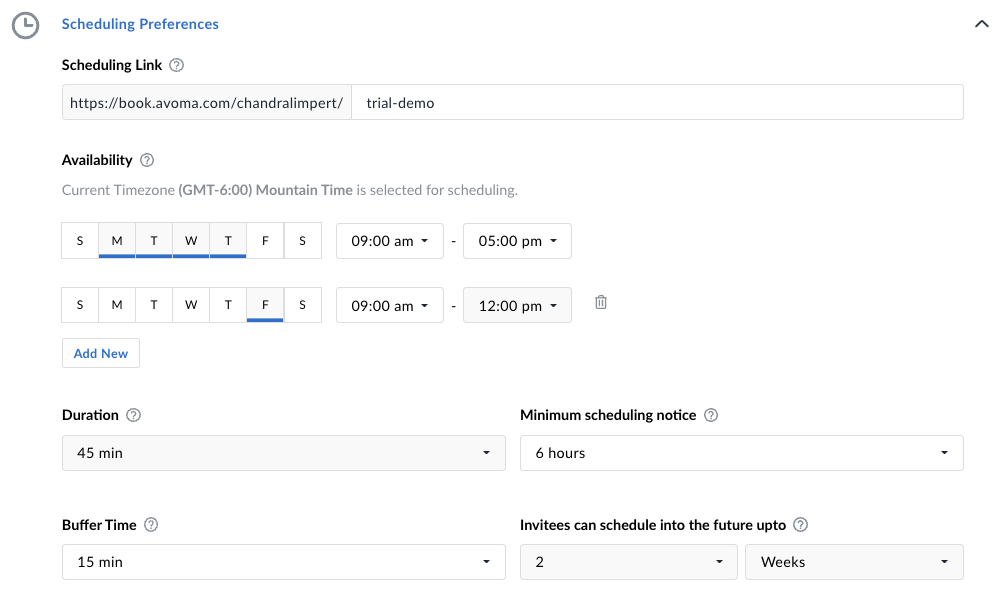
- Set your Scheduling Preferences, which determine your (and the rest of the group's) availability.
- Scheduling Link - Customize the public link that invitees will use to schedule a meeting.
- Availability Preferences - Select availability preferences to select availability hours for the group members.
- Same Hours for all members
- Different hours for all members
- Availability Hours for All Members - Select the days of the week and times of the day that the group members will be available for invitees to schedule meetings. If you'd like to set different hours of availability for different days of the week (for example, available 9am-5pm Monday-Thursday but only available 9am-12pm Fridays), click Add New and set your availability for a separate day.
NOTE: Time slots with already marked events will automatically be dropped from being available.
- Duration - Select how long events scheduled through this page will be. The minimum is 15 minutes; the maximum is 6 hours. Please be mindful of the maximum recording time allowed by your Avoma license.
- Minimum Scheduling Notice - Set a minimum notice required for attendees to schedule a new meeting.
- Buffer Time - Build in buffer time before and after these events to prepare for, or wrap up, other events.
- Invitees can schedule into the future up to - Set a future limit for invitees beyond which they cannot schedule any meetings using this link. The maximum is 6 months.
- Click Save & Next.
- Select which information you would like invitees to provide.

NOTE: By default, the invitee's name and email address are required. You can select whether you'd like to provide them the option to include their role, company name, an agenda, or invite additional guests. You can make any of these fields required, as well.
- Click Save & Close
- This scheduling page will now appear under your Scheduler tab, under My Scheduling Pages. You can now share this link so others can view your availability and book meetings with you directly.
A calendar invite is sent to all the members added to the group.
If a member was added but their calendar was not connected, they will receive an email indicating that they need to connect their calendar. Even though they are a part of the group we only send the final meeting invites to people whose calendar is connected.Viewing the Schedules
On the Scheduler's list view page, there are three (3) categories where saved scheules can be found.
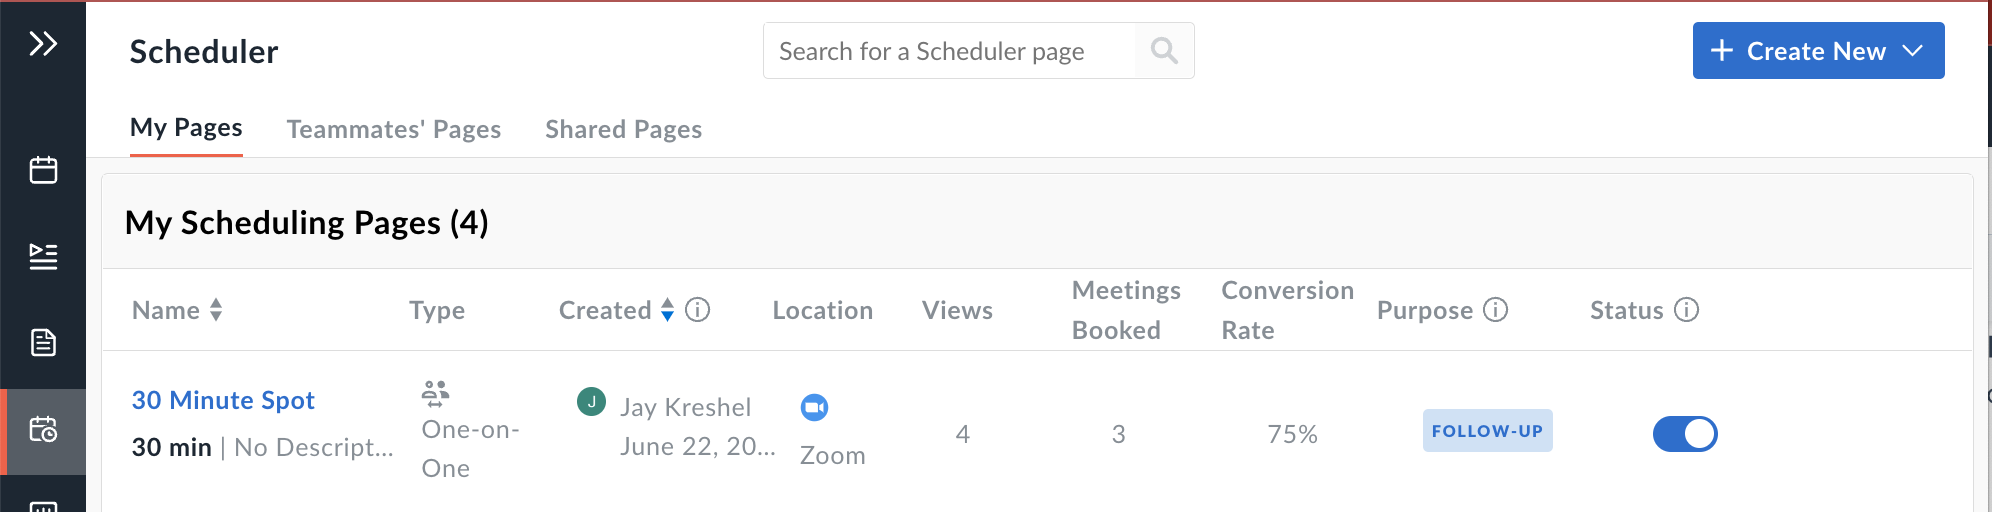
- My Pages - The Schedules created by the user. From here you can copy (to use), edit, clone and share the schedule.
- Teammates' Pages - The schedules created by any of your assigned teammates. From here you can also Copy (to use) the schedule, or View it as a a user would.
- Shared Pages - Lists each of the schedules where a group member has been added. Here you can edit, clone, view or share the meeting link.
NOTE: The following are the editing restrictions.
- Only the Organizer has access to edit the entire shared (group) page that they have created.
- If you are a member of any Group page, you will only have View access to the page's data.
- The only thing a member can edit is their Availability slots.
- If the availability preference is set to SAME timing for all, Only the organizer can set the availability slots for everyone.
- If the availability preference is set to DIFFERENT timing for all, then the member can only edit their own availability slots and nothing else from the form.
If you have any additional questions, reach out to our team at help@avoma.com