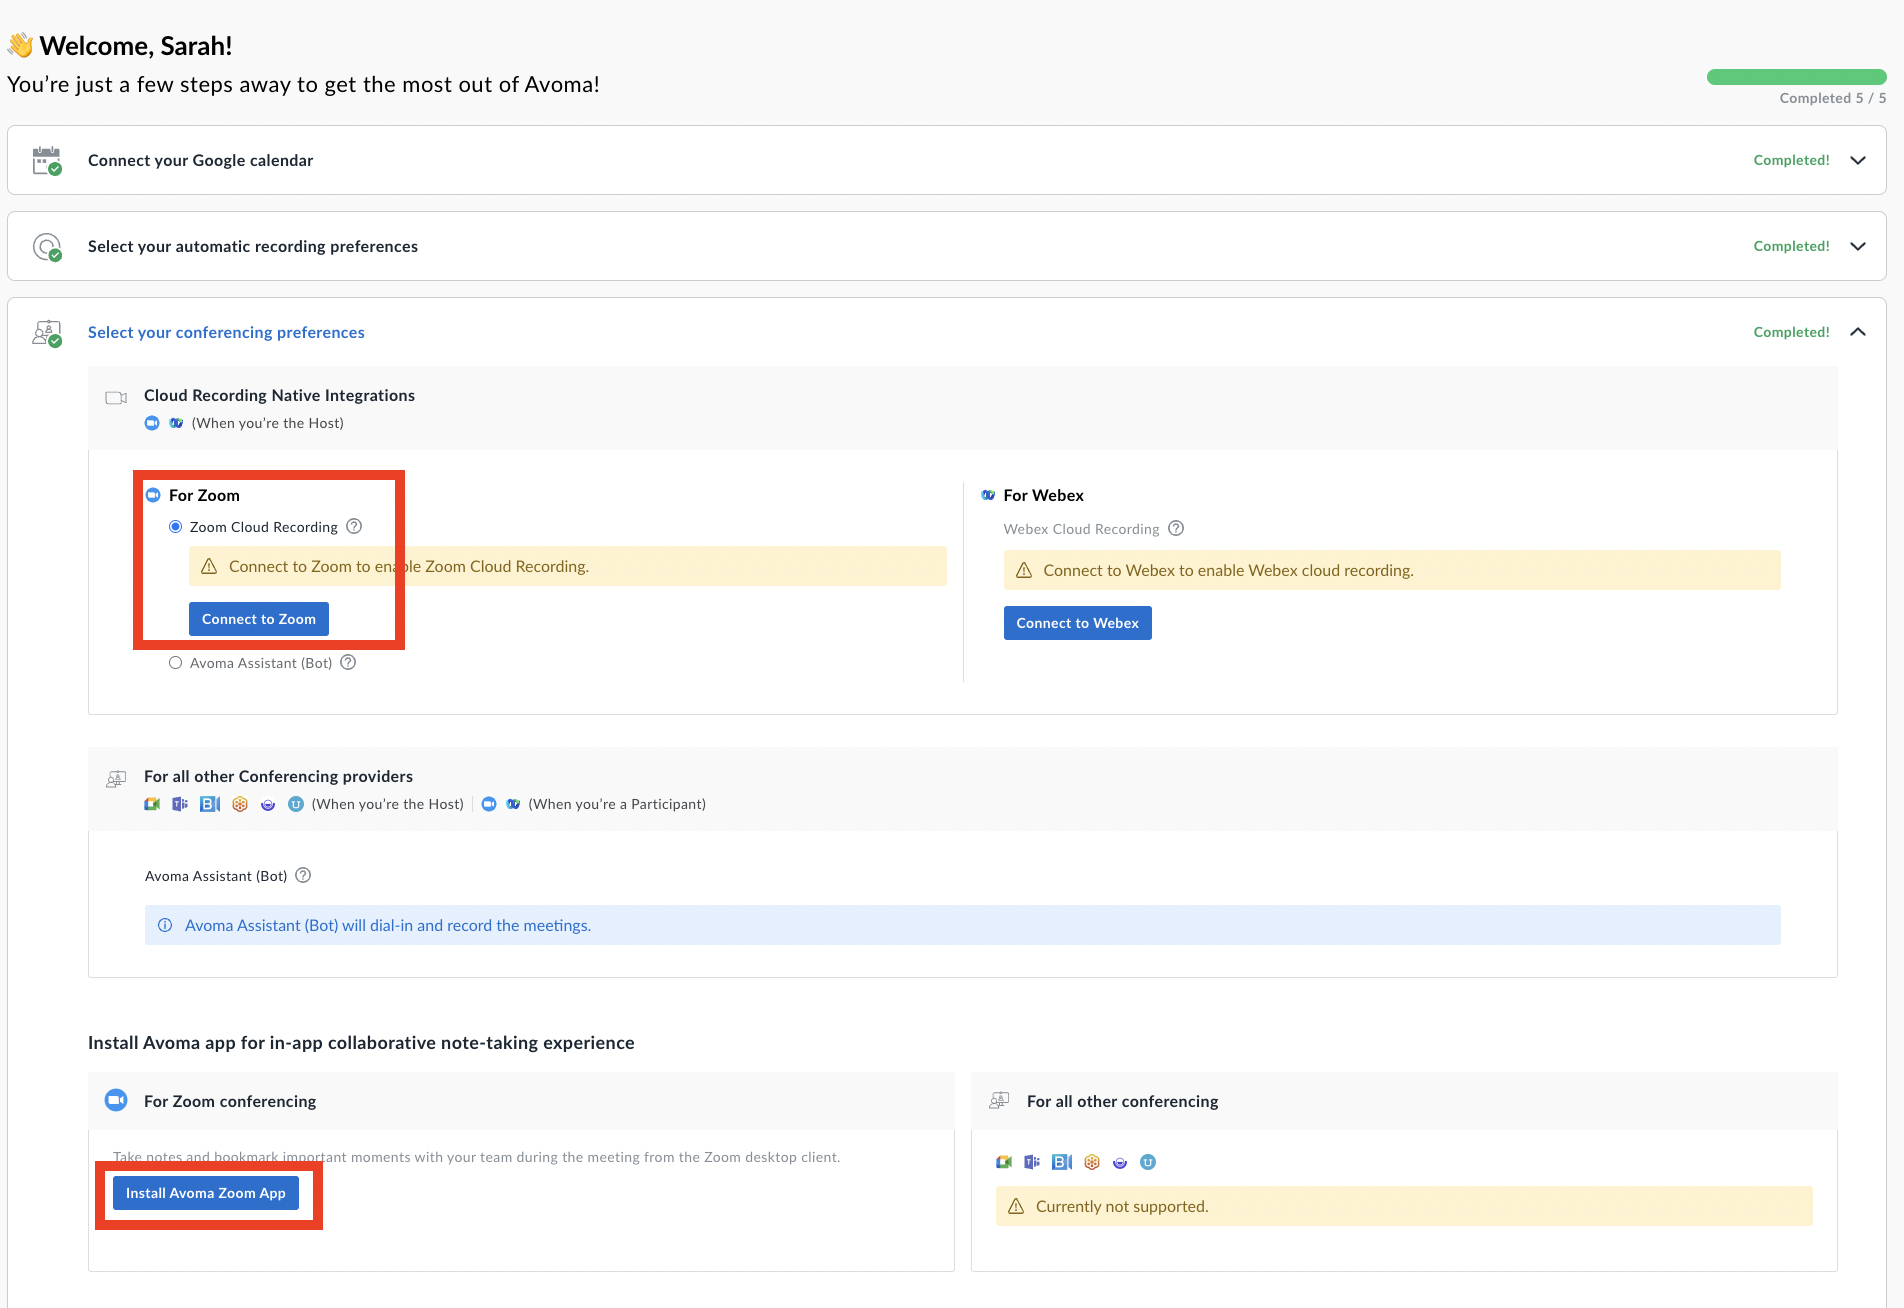
Setting your conferencing preferences
You can tell Avoma which conferencing system you plan to use to record your meetings. Avoma has integrations with some of them and provides extra benefits when doing so.
You can configure these preferences in Settings > Your Account > Conferencing Settings. Avoma works with conferencing systems like Zoom, Google Meet, and Webex to support and enhance your virtual meeting experience.
NOTE: You can also find this configuration as part of the Quick Start steps.
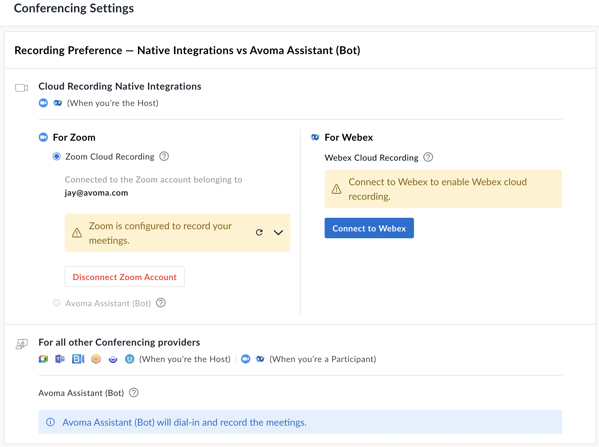
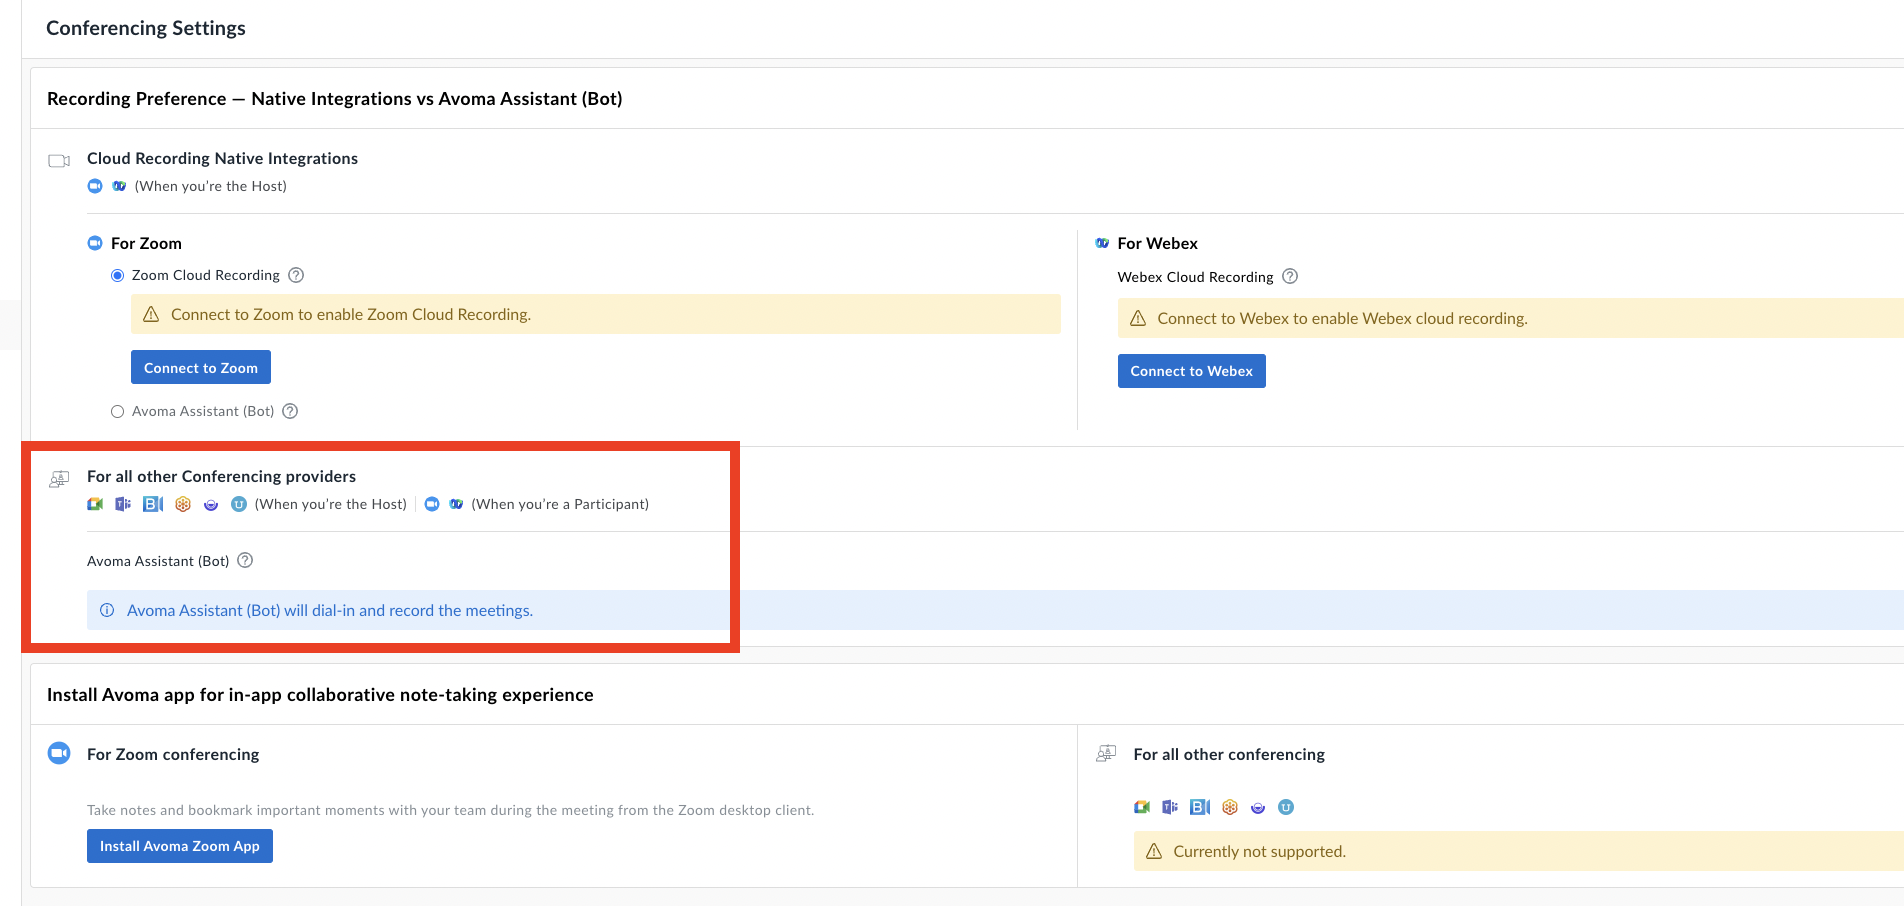
For Zoom (for when you're the Host)
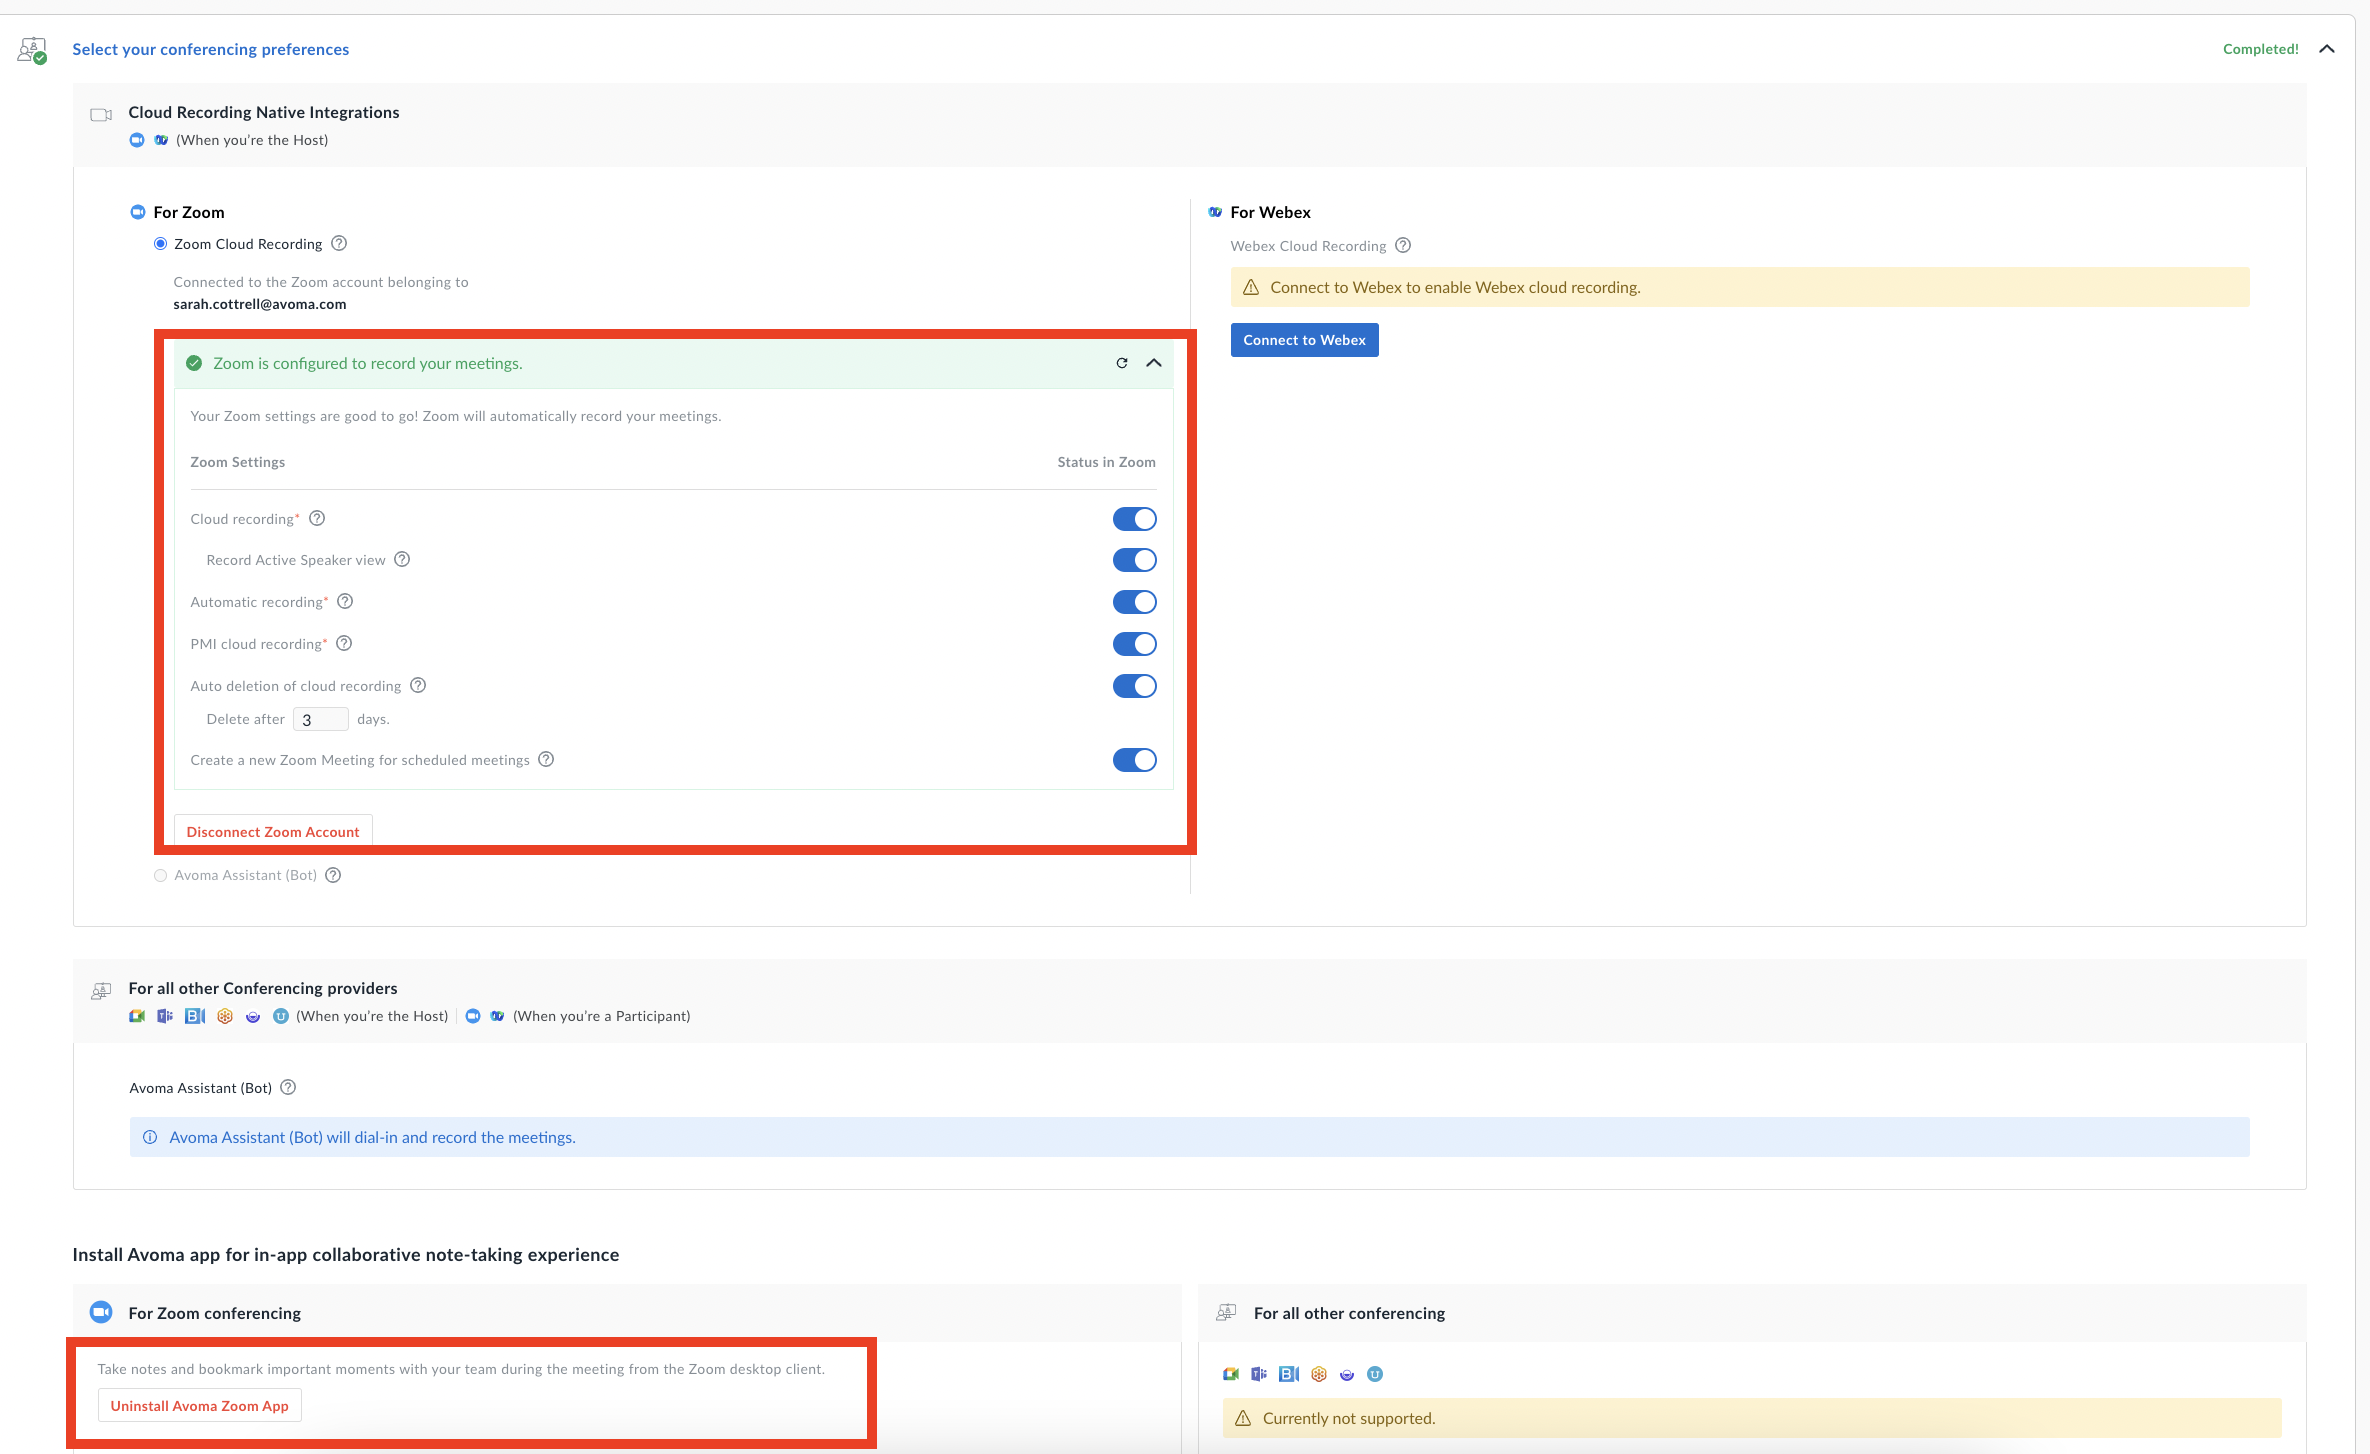
There are two options to integrate with Zoom: you will have the option to either record your calls via Zoom Cloud Recording, or by utilizing the Avoma Assistant (bot).
- Cloud Recording Native Integration: Avoma has native integration with Zoom. When you are the host of a meeting, you can use Zoom Cloud Recording to record. This means that Zoom records the meeting, and then the recording is sent to Avoma for transcription & AI Note Taking. When using cloud recording, you will NOT see the Avoma Assistant as an additional participant in the meeting.
NOTE: You will need a paid Zoom account to utilize this option.
- Avoma Assistant (Bot): Instead of being recorded by Zoom, the Avoma Assistant (Bot) will join the meeting as an additional participant and record the meeting.
We recommend using the Zoom Cloud Recording integration, which will allow Zoom to record the call and then pass the recording to Avoma to process. This also allows for a backup should there be an issue with the Avoma bot joining the meetings.
How to Connect with Zoom
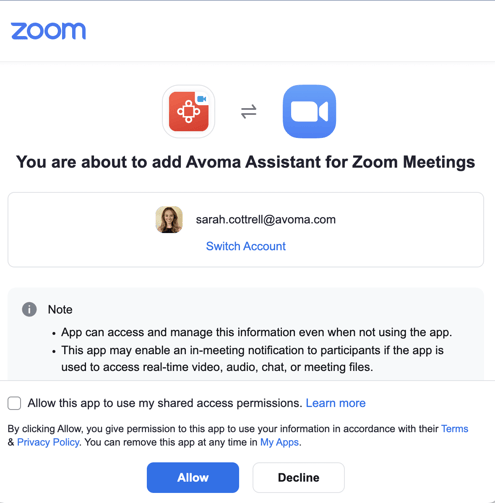
- Click Connect to Zoom and Install Avoma Zoom App
-
Allow permissions to Connect to Zoom and Install Avoma Zoom App
-
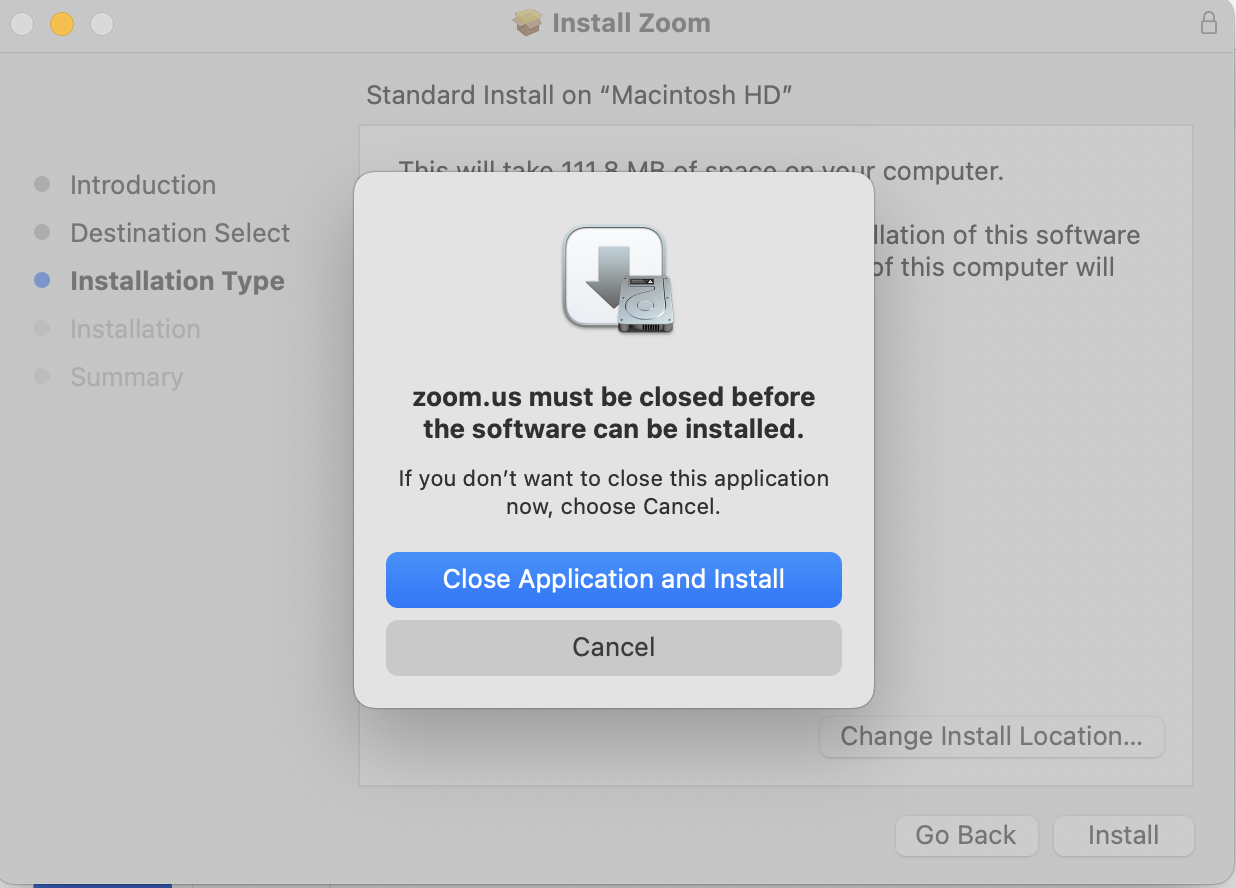
Complete installation
-
Your settings will show Zoom as your established conferencing system. Be sure to click the green dropdown menu to enable all settings.
-
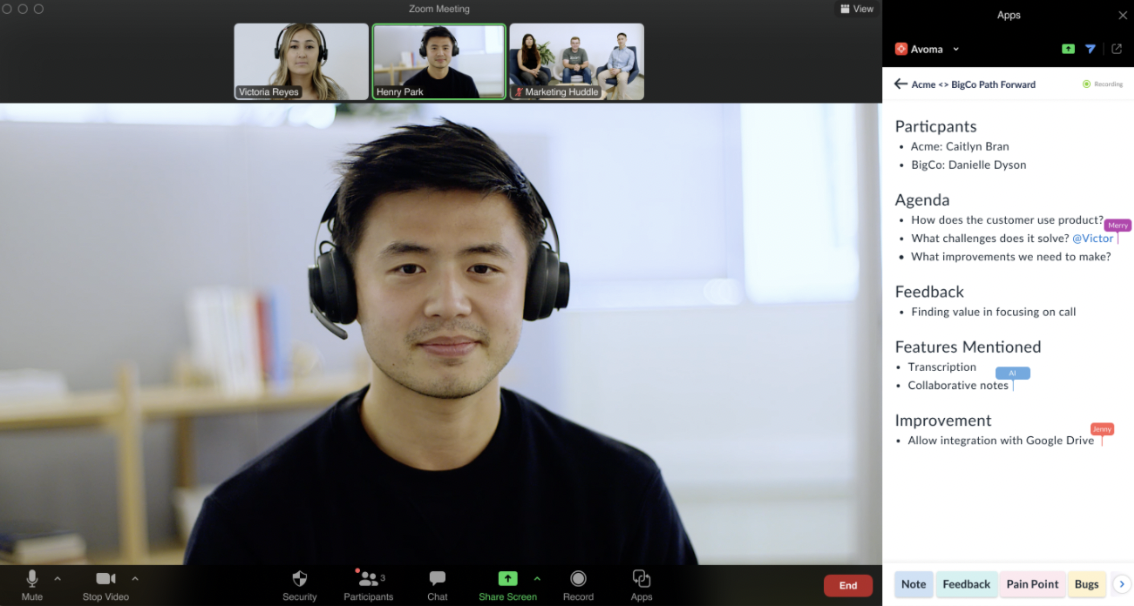
Log into Zoom for your next meeting to utilize Avoma’s notes in-app editor without needing to open a separate web browser.
For Webex (for when you're the Host)
Cloud Recording Native Integration: Avoma has native integration with Webex. When you are the host of a meeting, you can use Webex Cloud Recording to record. This means that Webex records the meeting, and then the recording is sent to Avoma for transcription & AI Note Taking. When using cloud recording, you will NOT see the Avoma Assistant as an additional participant in the meeting.
NOTE: You will need a paid Webex account to utilize this option.
How to Connect with Webex
- Click Connect to Webex
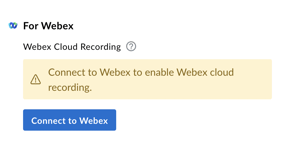
- A pop-up will appear that will allow you to log into your Webex account. Once completed, you will have confirmation that your Webex Cloud Recording is successfully configured.
For all other Conferencing providers
When you're the Host: When hosting a meeting using Google Meet, Microsoft Teams, Blue Jeans, GoToMeeting, Lifesize, or UberConference, the Avoma Assistant will join as a participant and record the meeting.
When you're a Participant: When participating in a meeting using Zoom (that is hosted by someone else), the Avoma Assistant will join as a participant and record the meeting.
NOTE: Your conferencing settings can be viewed or updated anytime.
NOTE: Webex meetings will not record if you are a participant; in order to record a WebEx meeting you NEED to have WebEx connected and you also need to be an organizer.
If you have any additional questions, please contact our team at help@avoma.com.