How to connect the right leads with right reps seamlessly with Avoma's Lead Routing
With Avoma’s Lead routing for Scheduler you can seamlessly set up routing to connect leads with the right reps. Build your routing rules using HubSpot or Marketo form fields, and specify the right destination for your leads in a matter of minutes.
Table of Contents
What is Lead Routing?
Lead routing allows sales teams to qualify their buyers by asking the right questions, segment their buyers based on their responses, and then route their buyers to a salesperson who is specialized in addressing the unique needs of a particular kind of buyer. Sales teams carefully define criteria to qualify their potential buyers - such as the buyer’s geography, company size, revenue, et al. For example, sales orgs create region-specific teams such as North America, Europe, and APAC to cater to buyers from those regions. Since sales teams cannot afford to waste time manually qualifying leads, automated lead routing solutions have become an industry standard when it comes to creating and scaling an inbound sales funnel.
However, configuring the most basic lead routing workflows can be tedious and cumbersome. Making the tiniest change could be an operational nightmare. Hence we decided to simplify lead routing for our customers. Say hello to Lead Routing for Avoma Scheduler 👋
How to set up lead routing in Avoma ?
Lead routing for Avoma Scheduler is available for users on Business plan only.
You'll need to be an ADMIN to be able to create a router.
Prerequisite :
-
Determine which reps on your team will receive routed leads.
-
For these reps, ensure appropriate scheduling pages are set up.
-
In Avoma:
-
Create one-on-one, Round Robin, or Group scheduling pages.
-
For a uniform scheduling experience, we suggest creating a managed page. Assign this to your reps to standardize one-on-one scheduling visuals.
-
For a Round Robin page, choose the reps to include. For instance, you might have an 'SMB Round Robin' for reps serving the SMB segment and an 'Enterprise Round Robin' for those dedicated to the Enterprise sector. When setting up a Round Robin page, if you aren't a rep, remember to omit yourself from the user list.
-
-
Setting up lead routing using Avoma Router is a cakewalk. Here is a step by step breakdown of how to set up lead routing in Avoma.
Connecting a HubSpot form or Marketo form.
Currently, Avoma Router integrates with HubSpot and Marketo forms, enabling automatic fetching of form fields for routing conditions. In the future, we'll expand to other form providers and even allow form creation within Avoma.
It is important to note that even if your primary CRM is Salesforce, you can still connect to HubSpot or Marketo through router in order to fetch the forms.
- Navigate to Avoma > Scheduler > Router.
- Click on the "Create Router" button.
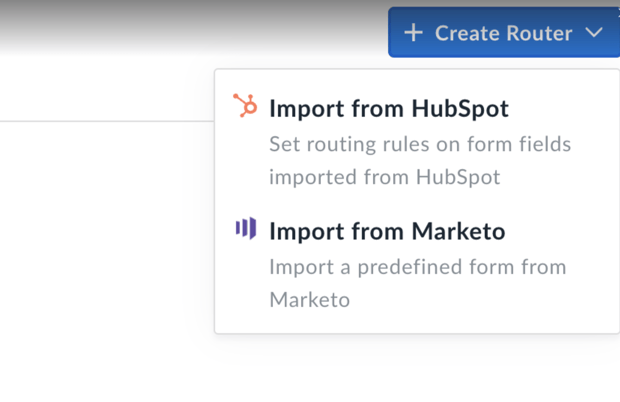
- If you haven't linked HubSpot forms or Marketo forms already, you will see two options - Import from HubSpot and Import from Marketo. If you have connected either of these, you will only see the option you last connected to.

Importing a form from HubSpot
Currently, Avoma Router is compatible only with HubSpot forms that were created using the Legacy editor. The new Form Editor does not provide the necessary features for seamless data exchange between HubSpot forms and Avoma Router. To ensure optimal performance with Avoma Router, we strongly recommend using HubSpot forms developed with the Legacy form editor.
- Selecting Import from HubSpot will open the Router creation flow. If you aren't connected, you will see a banner prompting you to connect you to HubSpot.

- Click on the "Connect HubSpot" button to initiate the HubSpot authentication process. This will open a popup window where you can sign in to your HubSpot account and grant Avoma the required permissions. Once you have successfully authenticated, the popup will close automatically and the screen will refresh automatically as well.
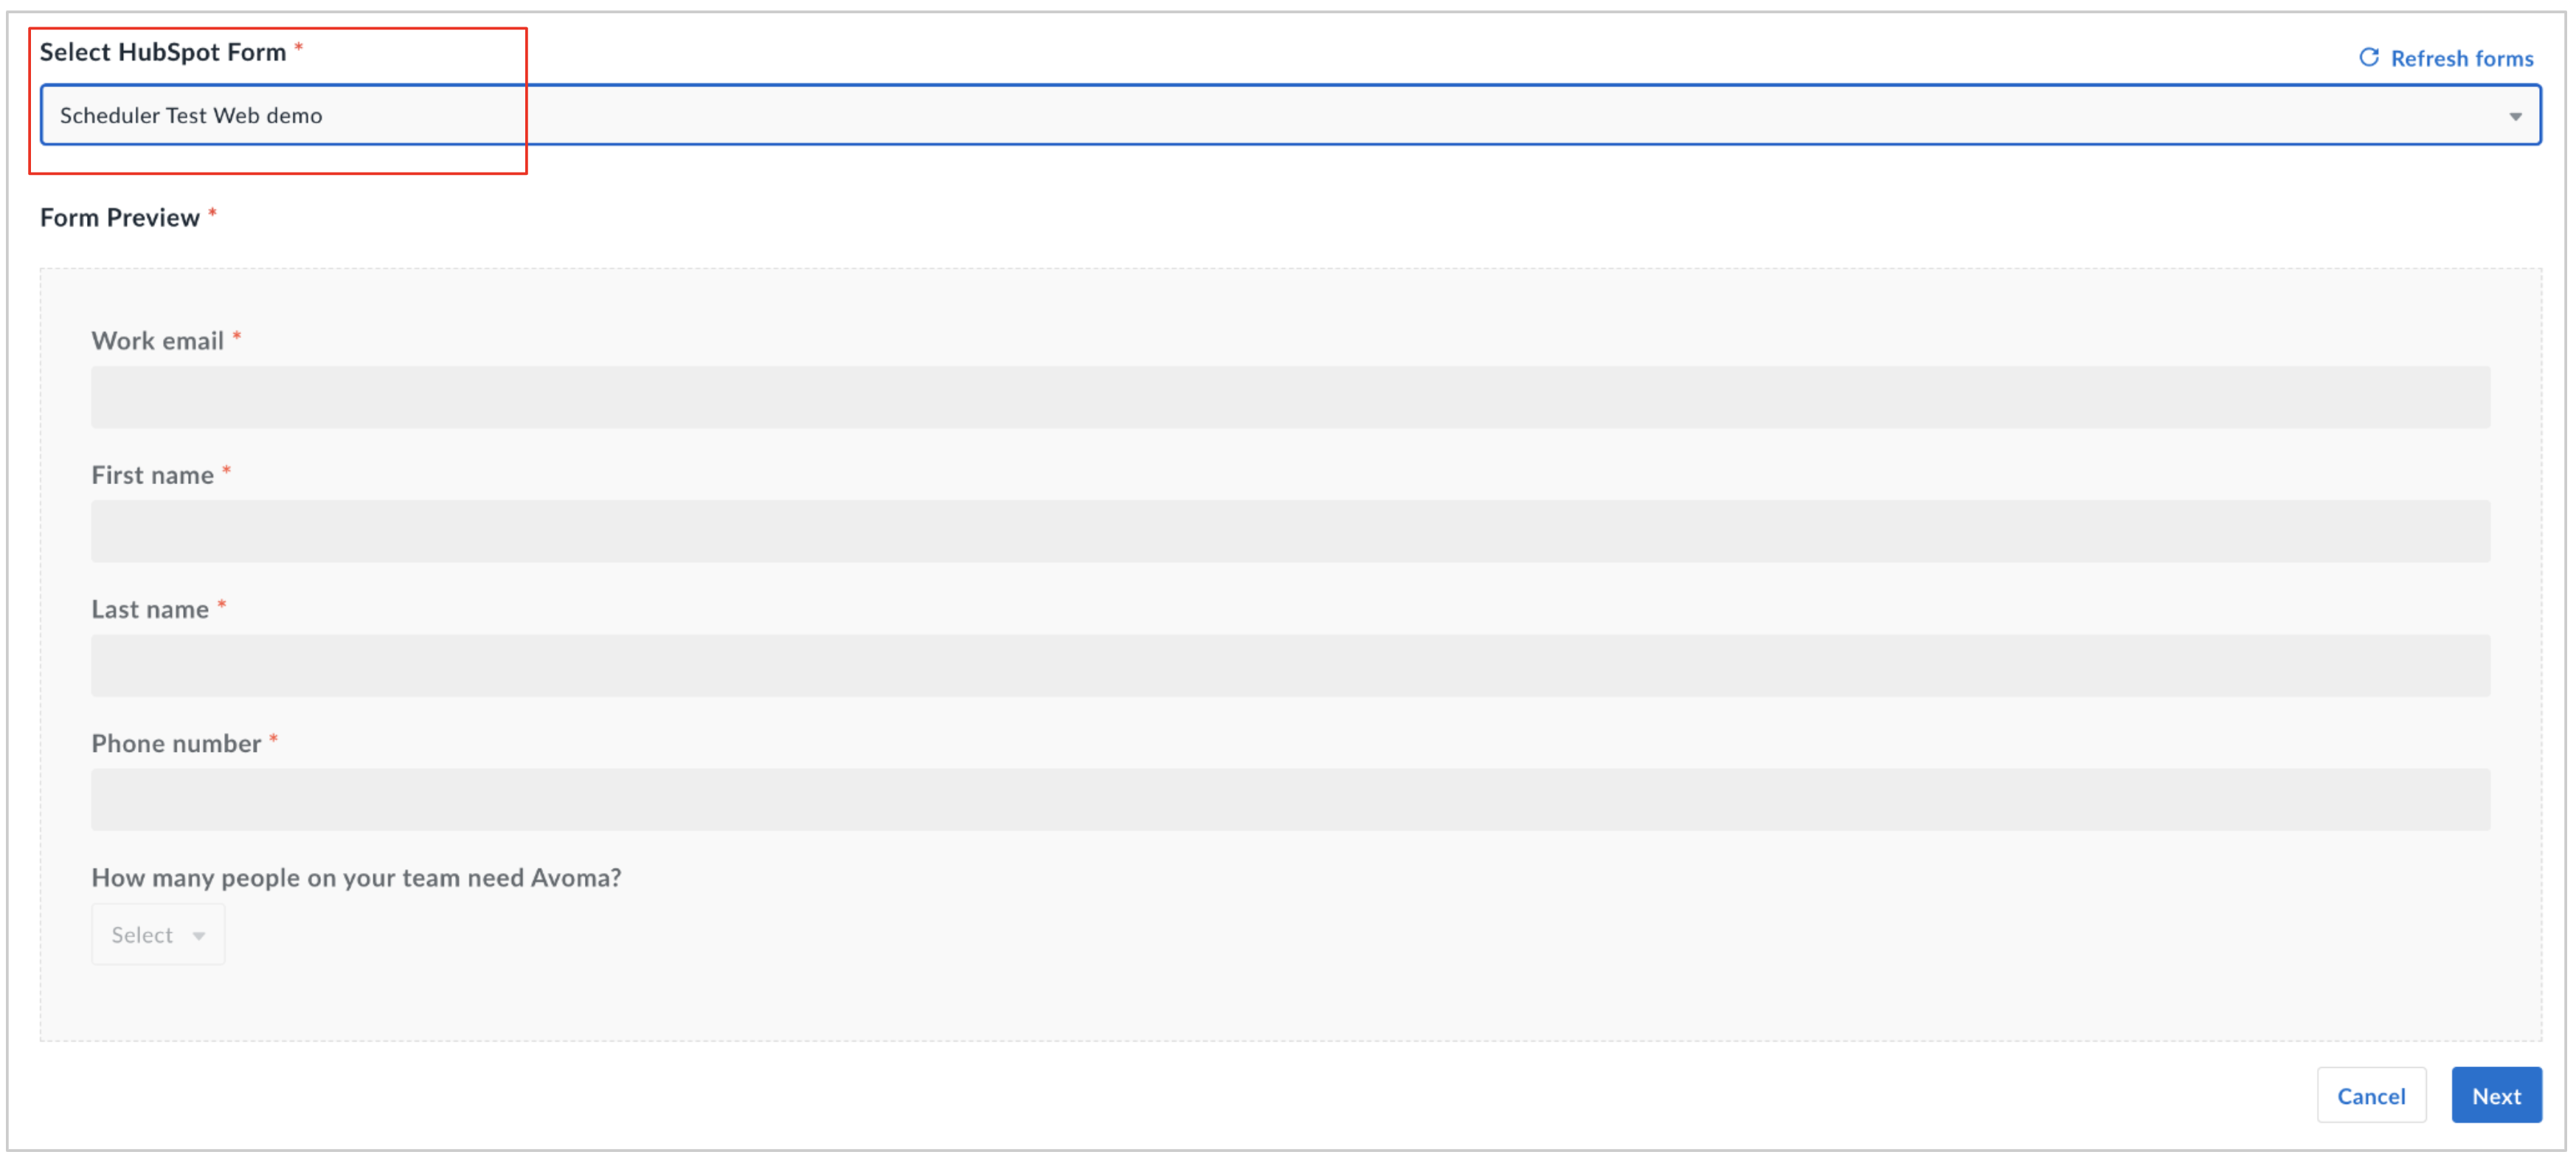
- Once you have successfully authenticated, the banner will disappear and the HubSpot forms will be displayed in a dropdown list in Avoma.
- Choose the HubSpot form you wish to use for lead routing. A form preview will appear .
- Click "Next" and proceed to define routing rules based on form fields.
Importing from Marketo
Selecting Import from Marketo will open the Router creation flow. If you aren't connected, you will see a banner prompting you to connect you to Marketo.

- Click on the "Connect Marketo" . This will open a popup window where you will need to enter Marketo credentials - Marekto Client ID, Marketo Client Secret and Marketo Munchkin ID.

- Enter the Marketo credentials and click on Connect. If the credentials are valid, Avoma will will connect to Marketo and fetch the Marketo forms configured in your Marekto account.
- Once you have successfully authenticated, the banner will disappear and the Marketo forms will be displayed in a dropdown list in Avoma.
- Choose the Marketo form you wish to use for lead routing. A form preview will appear .
- Click "Next" and proceed to define routing rules based on form fields.
Set up rules on form fields
-
Upon selecting a form, Avoma will fetch the form fields for rule setup. A default fallback rule is provided, displaying a message for non-matching form submissions. You can modify this rule to redirect visitors to various destinations such as an External URL, specific one-on-one, round-robin, or group scheduling page.

A routing rule has two parts: conditions and the subsequent route for the lead if conditions are met.
-
Click "Add Rule". In the "Select Field" dropdown under "Form Fields", Avoma displays the fields from your chosen form.
-
Choose a field for the routing condition. Next, select the relevant operators. Finalize the condition in the third dropdown. For certain fields like dropdown, multiselect, or radio button, Avoma auto-populates the options; simply make a selection.

-
After defining a condition, determine the Route. Under "Route To", pick a page type.
-
Based on your choice, a list of relevant pages will appear.
-
Choose the target page for the lead, considering the set condition.

-
Click "Save" to retain the rule.
-
Create several rules as per your requirements. Some rule examples include:
-
- If organization size ranges from 1-5, 5-10, or 10-50, redirect to "SMB Round Robin".
- For an Annual Revenue below $5M, direct to "Steve’s 1:1 page".
Note : Routing rules get evaluated sequentially. Execution halts once a rule is satisfied. Adjust rule order by dragging them up and down for desired evaluation sequence.

Adding a CRM ownership check
Your existing leads/customers should not have to start from scratch because they were routed to the wrong sales rep! Thanks to our robust integration with HubSpot, Lead Routing on Avoma lets you check if the lead exists in your HubSpot so you can route them to the contact/account owner.
Here is how you can add routing rule for CRM ownership check -
Prerequisite :
In order to to utilize this feature, you will need to first setup a managed page and assign it to those reps who could be owners of the lead/company record in HubSpot. In most cases, these will be your account executives and account managers.
Learn more about managed pages here.
To set up a routing rule with CRM ownership check,
-
-
Click on the Add Rule button, In the Select Field dropdown > CRM conditions section, select the CRM record matching criteria.

- Please note that if Salesforce is your primary CRM, you will see CRM conditions that are relevant to Salesforce
-
You can only add one CRM matching criteria in one rule but you can add multiple rules with CRM conditions.
-
In the Route To section, select Managed Page . This will list the managed pages that you have created. Select the managed page, the instance of which this lead is supposed to get routed to.

-
Here is how the CRM record matching criteria works -
-
Let’s assume you select “Invitee email domain matches email domain of a HubSpot company“, Avoma will check if there is a record in your HubSpot account whose company domain is same as the domain of email address entered by the lead/visitor.
-
We will then check if this record has an owner.
-
Once we identify the owner, Avoma will then identify whether the managed page specified in the Route To section was assigned to this owner.
-
Once that page instance has been identified, Avoma will route the lead to this page instance.
-
Example: Suppose you have a HubSpot contact with the email bob@acme.com, owned by Steve. When alice@acme.com interacts with the form, Avoma recognizes Alice's affiliation with Acme, identifies Bob's record owner, and then aligns Alice to Steve’s scheduling page.
-
-
We recommend that the routing rules with CRM ownership check should be given the highest priority so that they execute first and the right reps are being assigned to existing leads.
Embedding the router
Once your setup is complete, you'll need to incorporate this router on the same webpage hosting your HubSpot or Marketo form.
Embedding the router for HubSpot forms
Disable Redirects :
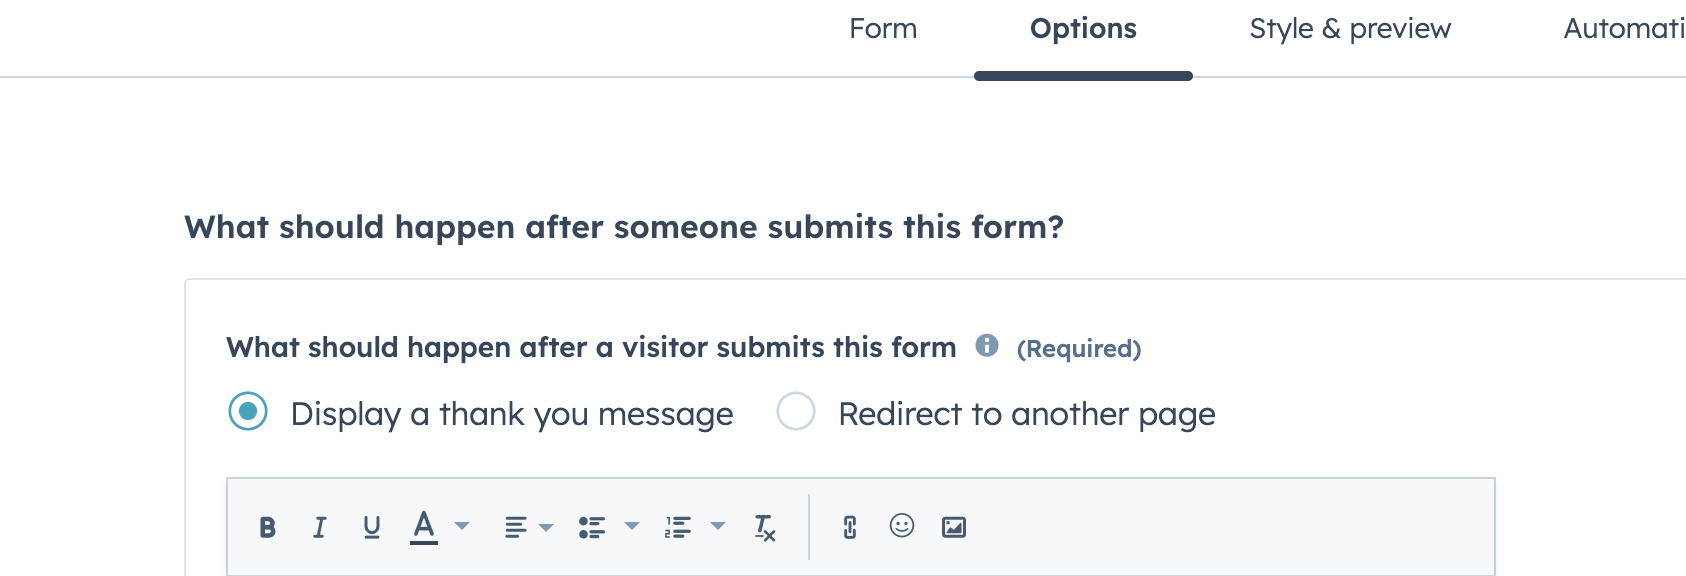
To ensure that Avoma Router loads in a popup after the form submission, you need to disable any redirects after form submission in HubSpot. You can add a redirect after booking in the individual scheduling pages that you are routing leads to.
In HubSpot, go to the form that you've configured > Options > What should happen after someone submits this form. Set this to "Display a thank you message"
Steps to Embed:
- Navigate to the router setup page's top right corner and select the "Embed" button.

- A modal will pop up displaying the embed code for the router.
- Copy this code and paste it onto the webpage containing the HubSpot form you linked in the initial step.
- Ensure the router code is positioned below the HubSpot form embed code.
Embedding the router for Marketo forms
Disable Redirects :
To ensure that Avoma Router loads in a popup after the form submission, you need to disable any redirects after form submission in HubSpot. You can add a redirect after booking in the individual scheduling pages that you are routing leads to.
Steps to Embed:
- Navigate to the router setup page's top right corner and select the "Embed" button.

- A modal will pop up displaying the embed code for the router.
- Copy and paste this code into your website after the Marketo embed code
- If you're using Marketo landing pages rather than solely the Marketo Form embedded on your website, please contact Avoma support to get the Router embedded on your Marketo Landing Pages.
With these steps complete, you're good to go! Now, when site visitors interact with the form and submit their information, a modal will appear directing them to the appropriate scheduling page based on your specified routing rules.
