Table of Contents
- What are Managed Pages?
- When to use Managed Pages?
- Creating a Managed Page.
- Assigning a Managed Page to members.
- FAQs
What are Managed Pages ?
Managed pages are scheduling page templates that help admins ensure a consistent scheduling experience for customers. Admins can enforce best practices by creating a template for scheduling page once and assign it to members so that they get their own copy of this managed page. It helps admins and members save time on creating pages and making sure they adhere to organizational standards.
Note : 'Managed Pages' is available for only to users with a Starter or above license. Both the admin as well as the members to whom the page is assigned will have to be on a paid plan.
When to use Managed Pages?
Managed Pages are a great option if you want to ensure that scheduling pages adhere to specific standards for all members in your organization. By using Managed Pages, admins can enforce scheduling best practices and save time on creating pages while ensuring that members adhere to organizational standards.
Some events for which you may want to use Managed Pages include Interview calls with candidates, AE product demo calls, One-on-One calls with team members etc.
Creating a Managed Page
To create a Managed Page, here are the steps that the Avoma Admin can follow :
- Navigate to Avoma > Scheduler > Managed Pages
- You will see a "Create Managed Page(one-on-one)" button. You can also directly create the Managed Page using the Create New button at the top right corner on the Scheduler page. Click on either of these.

- Add the event information just like how you'd do when creating a regular one-on-create a one-on-one scheduling page.
Note : To restrict members from editing specific information in a section, simply turn on the lock option for that section. This ensures that the information remains consistent and adheres to organizational standards.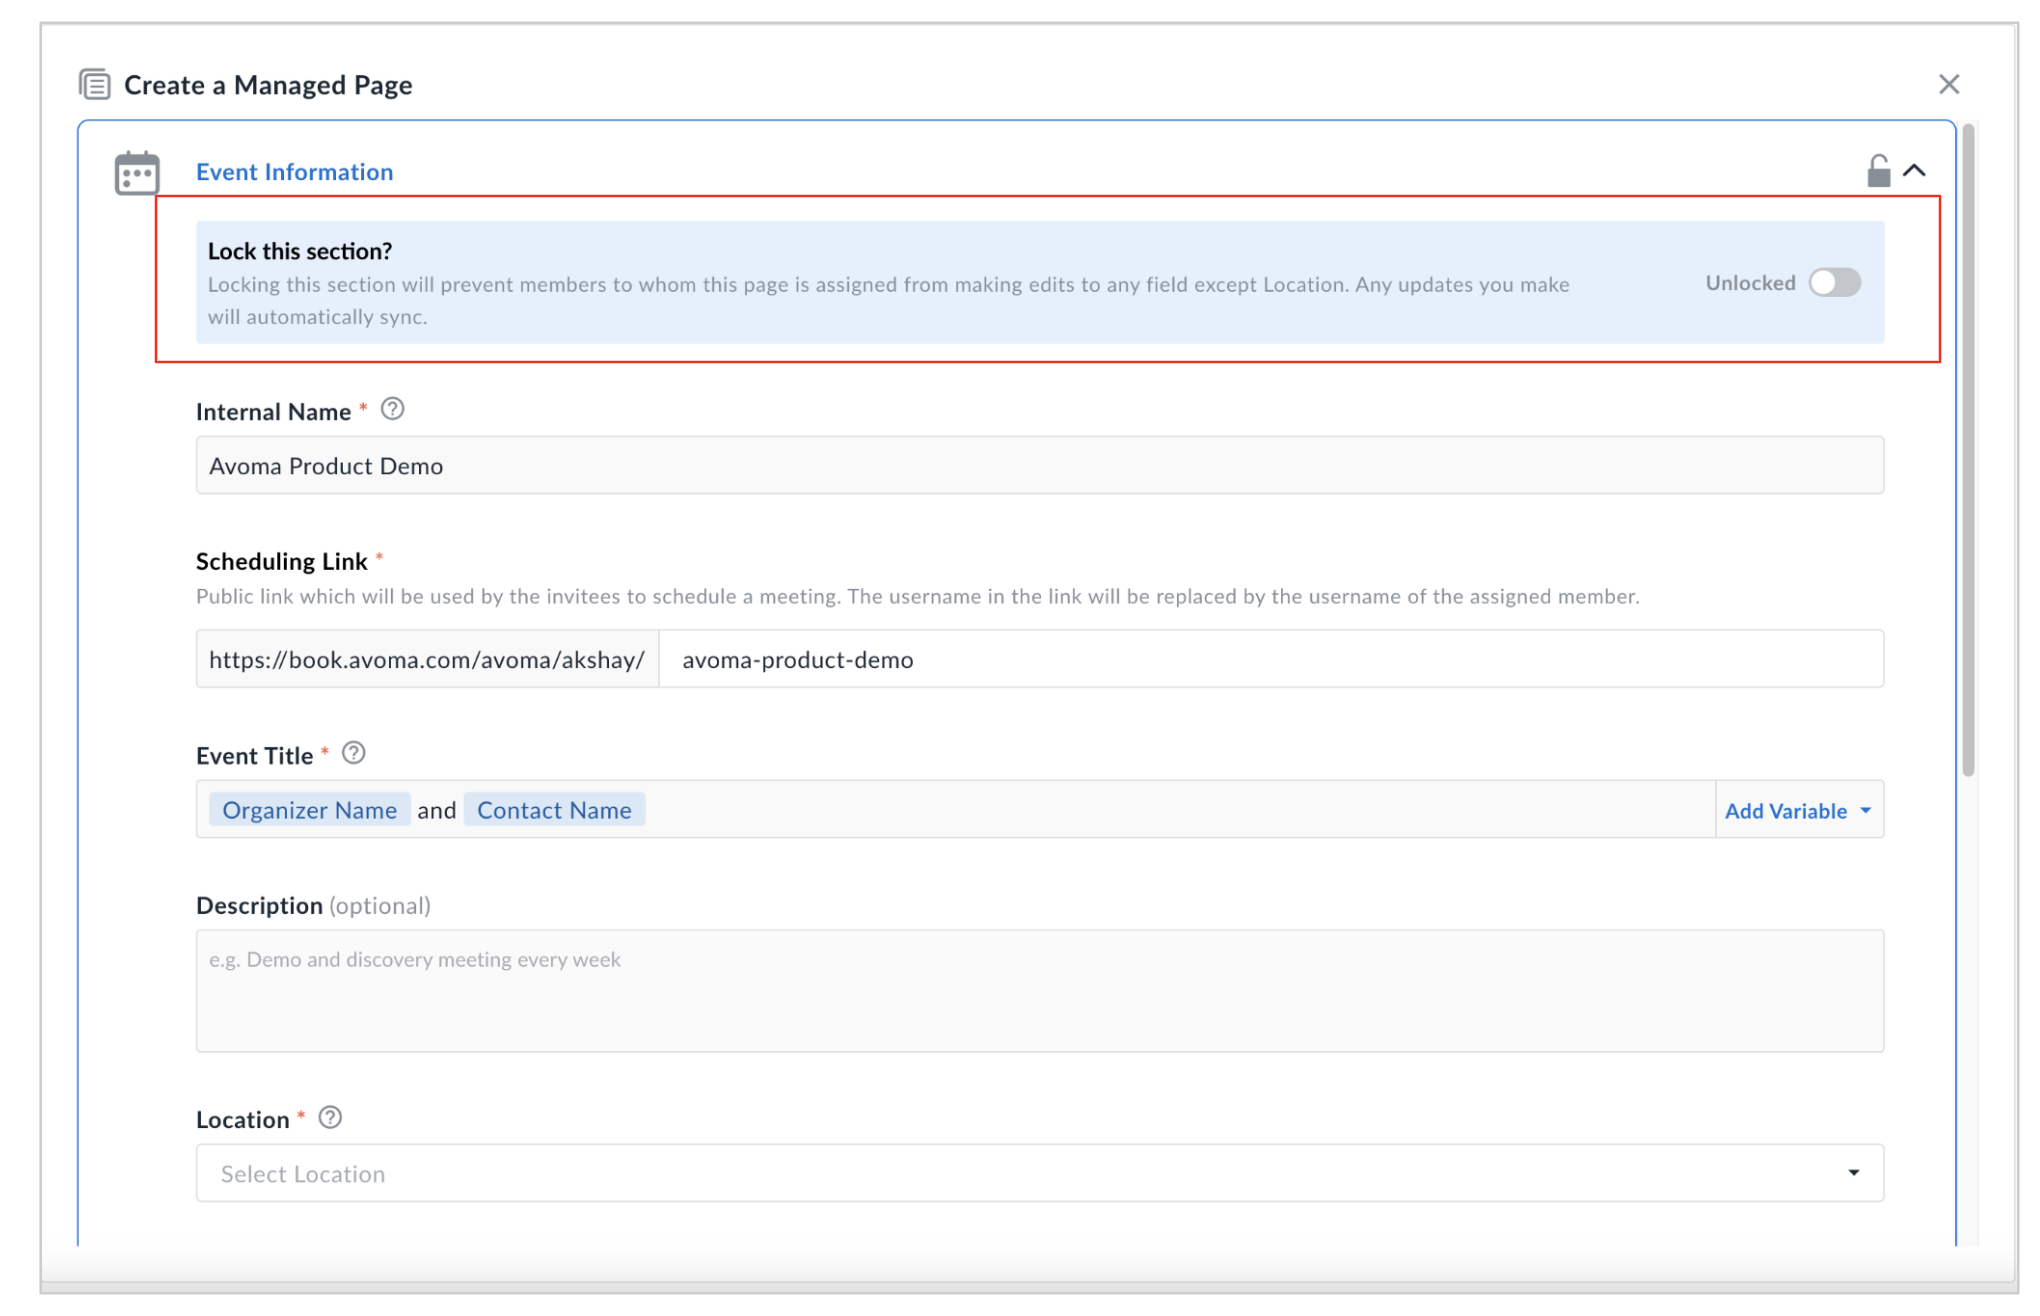
- Repeat the same process for the rest of the sections. By locking a section, all the details in that section will be locked.
-
After you click on "Save & Create" in the Confirmation Page Preferences section, the managed page will be created. You can now assign this managed page to members.
Note: It's important to note that even if the Event Information section is locked, members who are assigned this page will still have the ability to edit the Location and select the most suitable option for them.
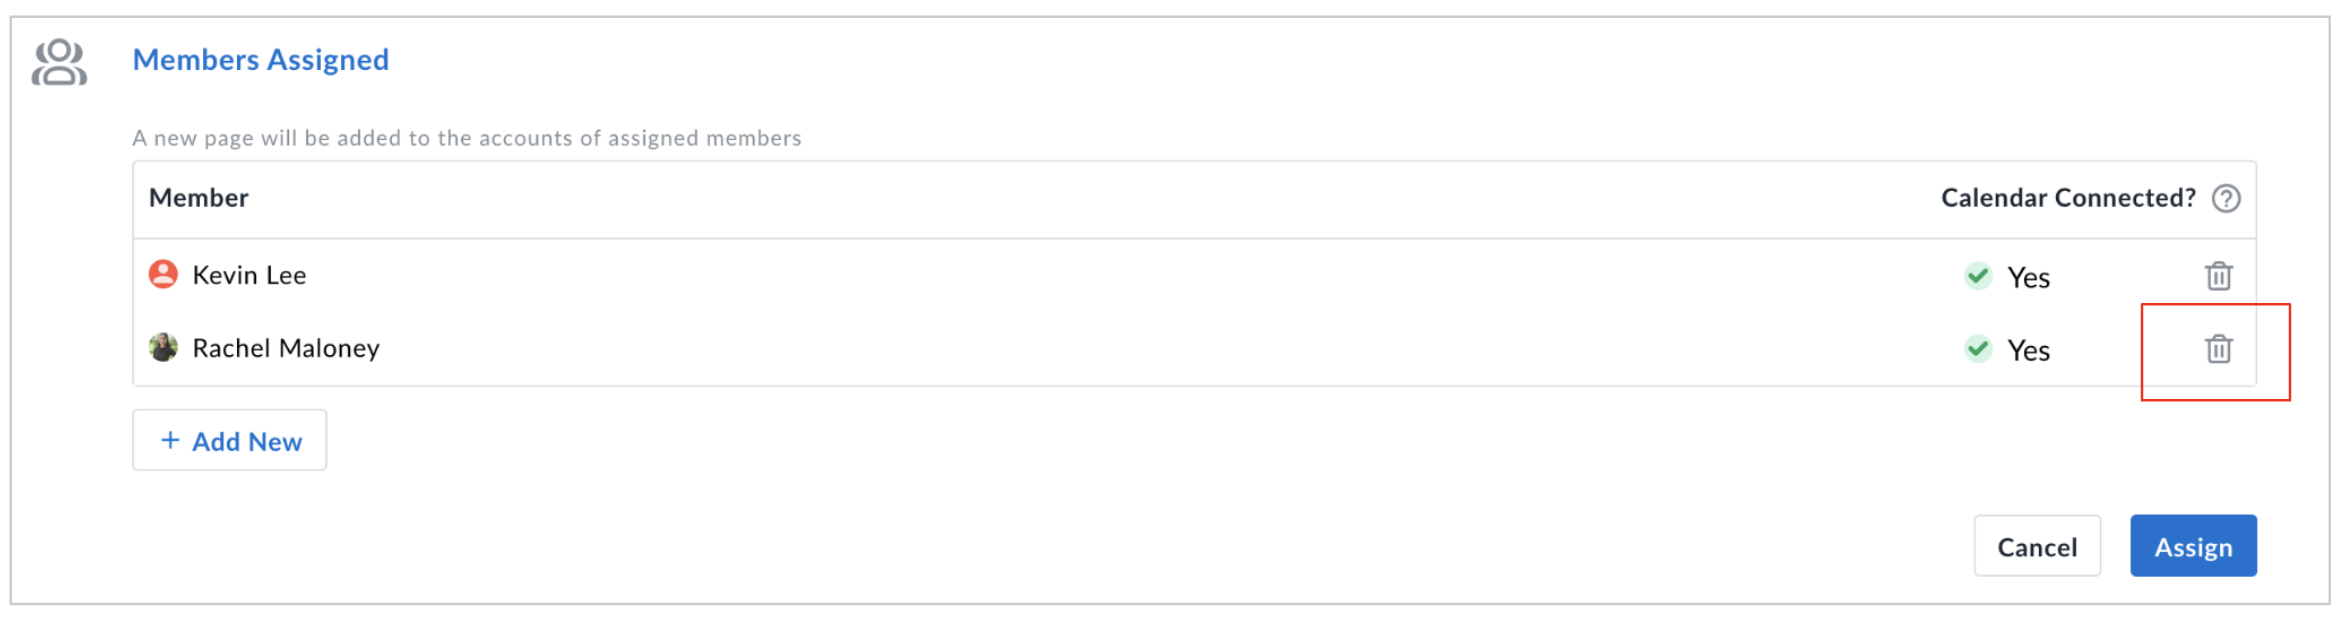
Assigning a Managed Page to members
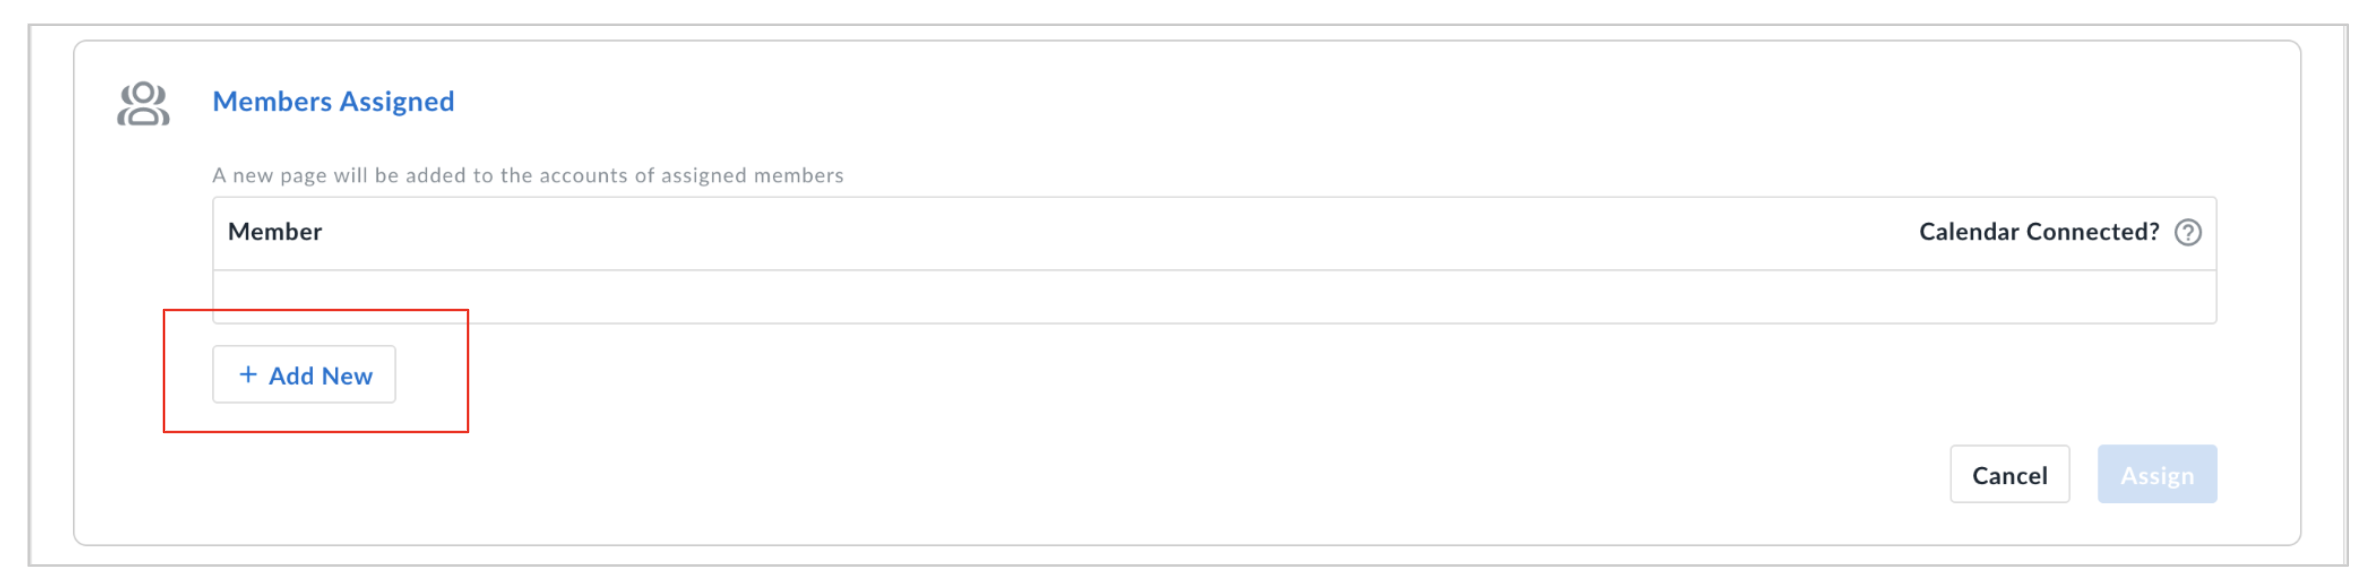
After creating your Managed Page, you can assign it to one or more members.
- In the Members Assigned section, click on the Add New button to select members you want to assign this page to.
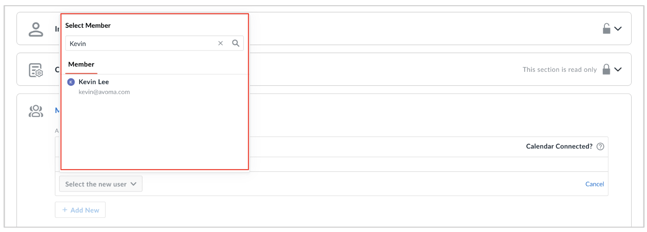
- In the popover that appears, search members that you want to assign this page to and click on their name to add them.
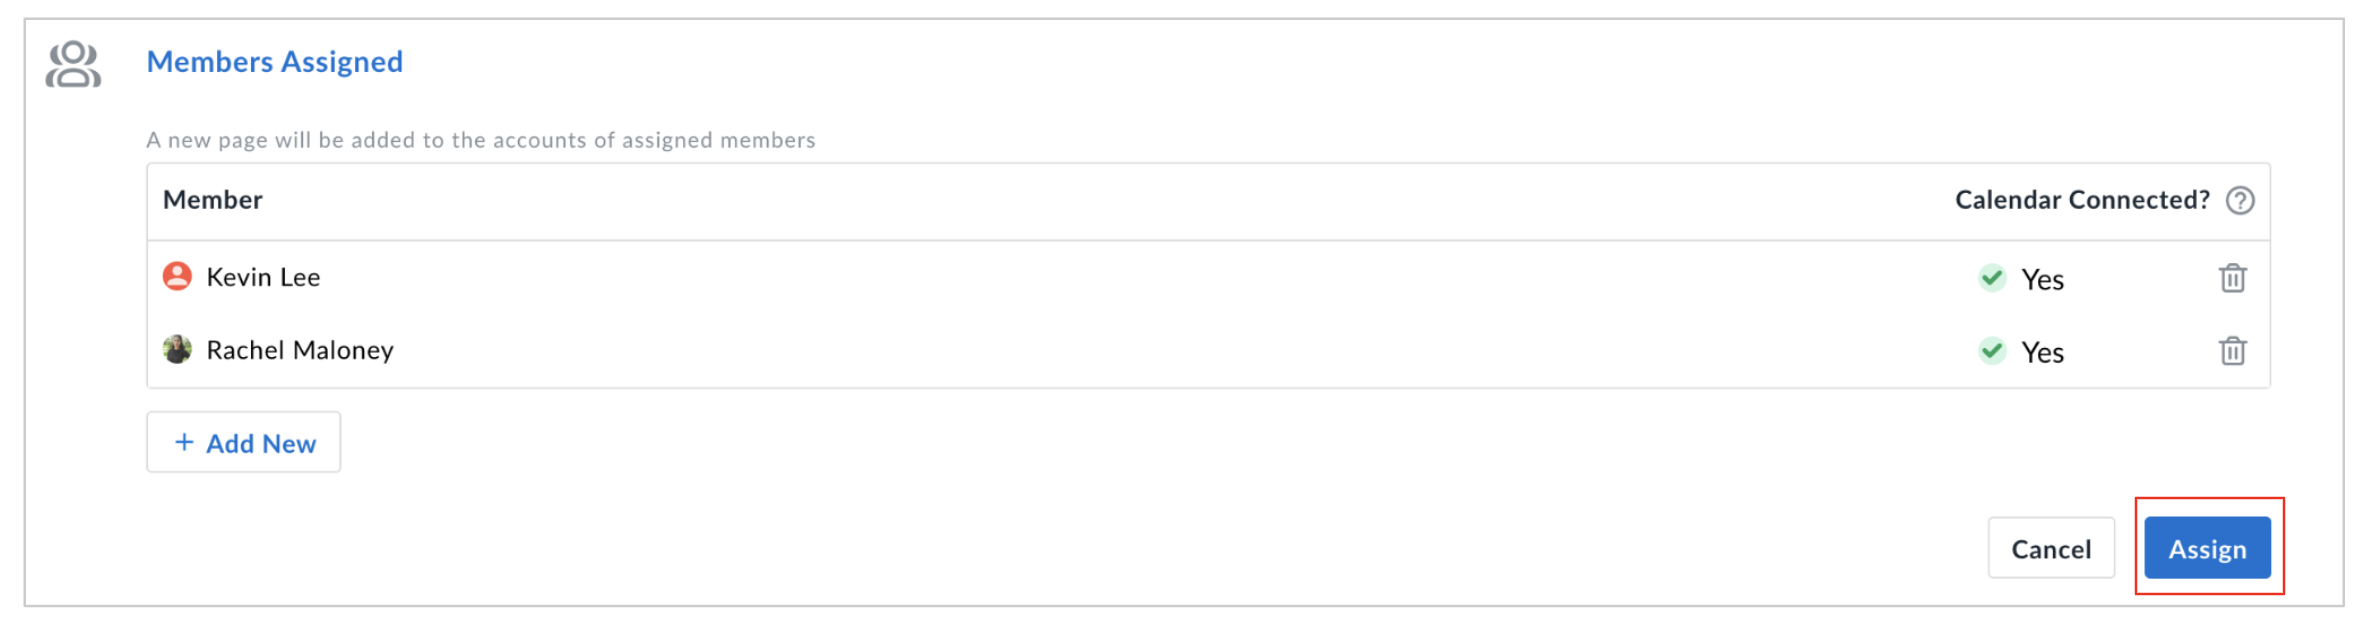
- Once you've added members, the Assign button will be activated. Click on Assign
- Once you assign this managed page to users, they will get their own instance of this managed page.
- When members view the Managed Page assigned to them, they will see that it is "Admin Managed" and certain sections will be marked as Read-Only.
- If you want to unassign this page from a member, click on the delete icon and confirm the deletion in the confirmation modal that shows up.
FAQs
- What does locking a section mean?
- Locking ensures that updates made by admin to the managed page sync to the members' instances of this managed page.
- If a section is not locked, members have the ability to edit the information in that section.
- Updates to a section that is not locked will not be synced over to the members' instances of this managed page..
- If a member modifies an unlocked section in their instance of the managed page and admin later locks and updates that section, the updates will override the changes made by the member.
- What happens when admin tries to assign the managed page to a member and a page with a similar link already exists for the member ?
If the assigned member has a page with a link similar to the instance of the managed page, we will append the link of the managed page with a number.
For e.g - If a member has a page with the link ".https://book.avoma.com/kevinlee/product-demo", the new instance of the managed page will have the link as - "https//book.avoma.com/kevinlee/product-demo-1" - What happens when a Managed Page is deleted?
If an admin attempts deleting a managed page, they will be shown a confirmation modal stating that this will delete all the instances of this managed page assigned to members. Once the admin confirms, all the instances of this managed pages will be deleted and members will no longer have access to those pages.
If you have any additional questions, please reach out to our team at help@avoma.com