If you have just signed up with Avoma this guide will walk you through setting up your account so you can capture, transcribe, and enhance your conversations effortlessly. Whether you're an individual user or part of an organization, following these steps ensures you're ready to unlock insights from your meetings.
Completing these steps ensures:
- Avoma can automatically detect and record your meetings
- Your emails sync seamlessly for context and follow-ups
- Transcripts are accurate with proper speaker identification
Notes and action items flow directly into your CRM (admin setup)
Step 1: Sync your Google or Outlook calendar
Avoma uses your calendar to automatically detect upcoming meetings and join links. This ensures no meeting slips through.
How to sync your calendar:
- Go to the Quick Start tab or click here.
- Click Sync your Calendar.
- Make sure you choose your work account.
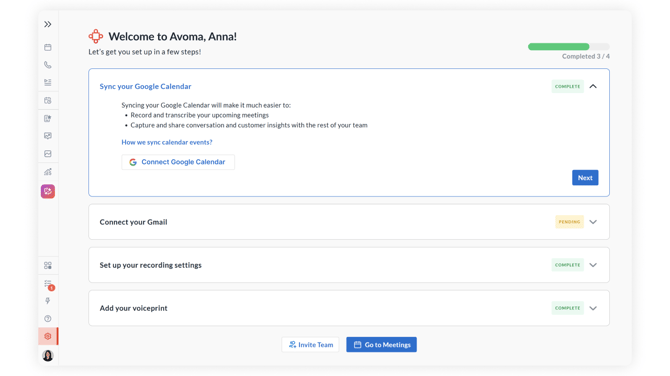
4. Follow the prompts to grant Avoma access.
Admins can centrally manage calendar settings for the entire org. See: Avoma Workspace Configuration (For Admins).
Step 2: Connect your email
Connecting your email (Gmail or Outlook) allows Avoma to sync meeting-related emails for full context around your conversations.
How to connect your email:
1. Click on Connect your Gmail (or Outlook).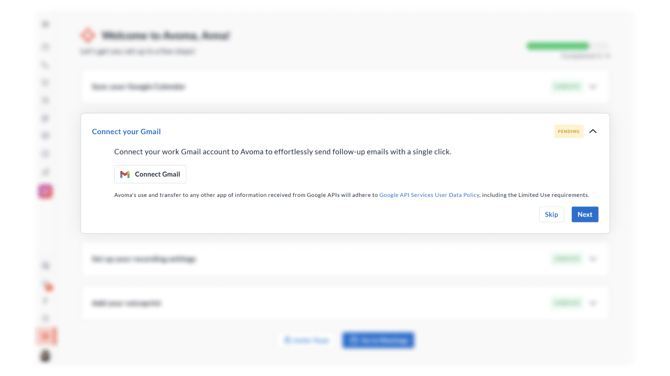
2. Authenticate your account and grant permission.
Admin note: Email integrations can also be centrally managed for your entire team. Learn more in Avoma Workspace Configuration (For Admins).
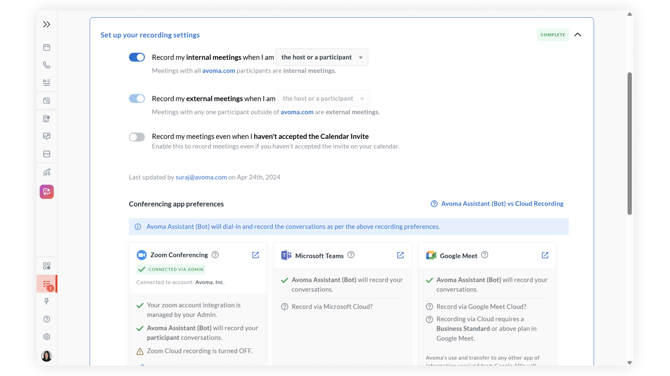
Step 3: Set up your recording settings
Recording preferences let you decide which meetings Avoma should capture automatically.
How to set recording preferences:
- Click on Set up your recording settings.
- Choose your preferences:
- Record my internal meetings – Internal meetings are those where all participants are from your own domain (e.g., @yourcompany.com).
- Choose if Avoma should record internal calls when you are the host or when you are just a participant.
- Record my external meetings – External meetings include anyone outside your domain (e.g., customers, prospects, or partners).
- Choose if Avoma should record external calls when you are the host or when you are a participant.
- Record my meetings even when I haven’t accepted the Calendar Invite – Enable this if you want Avoma to record meetings that appear on your calendar even if you didn’t explicitly RSVP “Yes.”
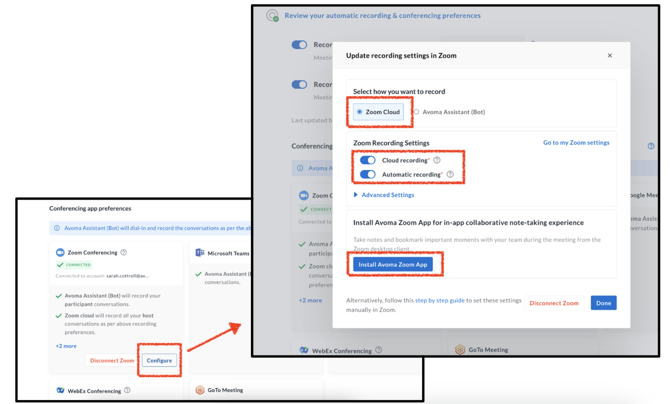
- Authenticate your Zoom account with Avoma
- Click into Configure to enable Zoom Cloud, Cloud Recording and Automatic Recording
- Download the Avoma Zoom app for a better meeting experience
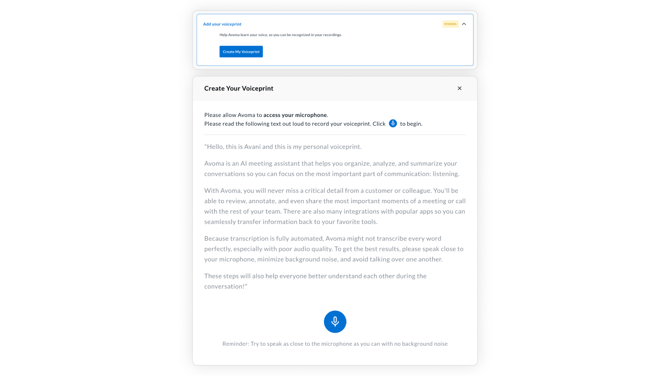
Step 4: Add your Voiceprint
Your Voiceprint teaches Avoma to recognize your voice, improving transcript accuracy and speaker identification.
How to add your Voiceprint:
- Click on Add your Voiceprint.
- Avoma will ask you to grant microphone access.
- Read the sample script provided on screen (about 30–40 seconds long). It introduces you and explains how Avoma supports automated transcription and meeting insights.
- Click the 🎤 microphone icon to begin recording.
Step 5: Connect your CRM (Admins only)
CRM integration ensures that notes, action items, and insights automatically sync to your CRM, keeping everything updated without manual work. Note: Only a user with Avoma Admin + CRM Admin permissions can complete this step.
Note: Only a user with Avoma Admin + CRM Admin permissions can complete this step.
How to connect your CRM:
- Click Connect your CRM to sync notes.
- Select your CRM provider (Salesforce, HubSpot, Zoho, Pipedrive, Copper).
- Follow the prompts to authorize.
For detailed steps https://help.avoma.com/connecting-to-your-crm
Need Help?
If you have any questions or need further assistance, contact our support team at support@avoma.com.
Welcome aboard, and happy meeting!