What is the purpose of Avoma Revenue Insights?
Avoma's Revenue Insights allows organizational leaders to take the sales opportunities from within your Customer Relationship Management tool (CRM) and display key tracking data to determine progress and sales viability.
Out of the box, Avoma ships with default views, with a range of filters in each of them.
- Open Deals
- Commit
- Pipeline
- Best Case
- Closed Won
- Closed Lost
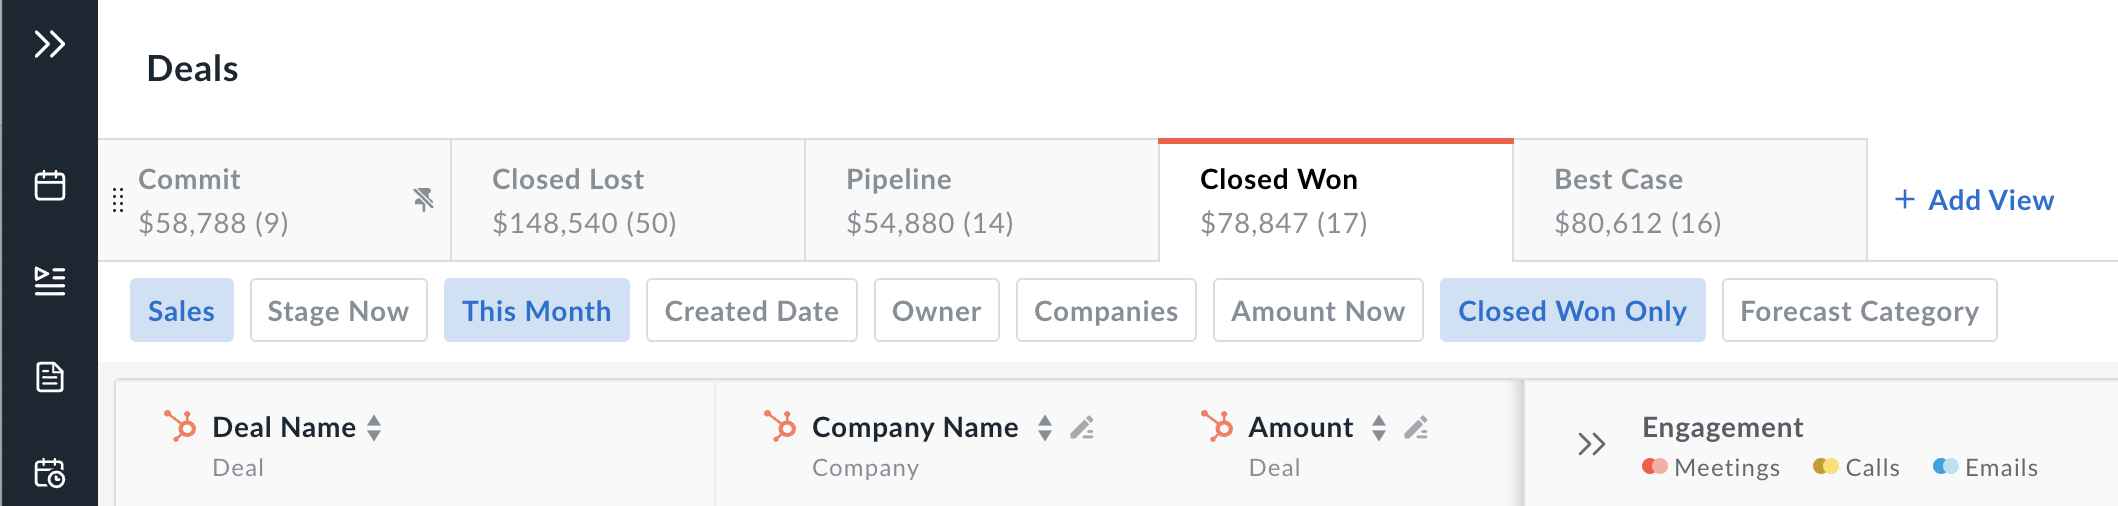
NOTE: Under the title of each view, the deal value and total amount of deals for each saved views is shown. These are recalculated for every filter change so you understand in real-time the amount of the filters.
Synchronizing your CRM Deal Data with Avoma
By integrating with your CRM (e.g., Hubspot, SFDC), Avoma will display the sales data (e.g., Close Date, Amount, & the Stage) that each of your deals is in, as well as show momentum (whether the opportunity is moving up or down) of that opportunity.

NOTE: As the information is updated in either the CRM or Avoma Revenue Intelligence, the corresponding data field will be modified as part of a 2-way field update.
Combining CRM Data with Insights
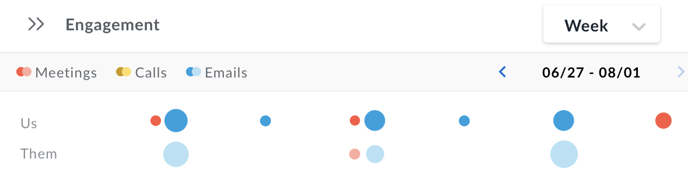
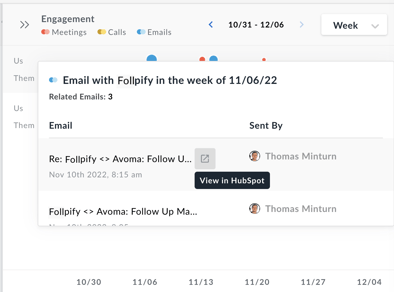
View engagement summary in pop-over
- Meetings. Meeting (Name, Date, time of send, and duration), Host, and Purpose/Outcome)
- Calls. Meeting (Name, Date, time of send, and duration), Host, and Purpose/Outcome)
- Emails. Email (Name, Date, and time of send), Sent by
Actionable Analysis for Sales Leadership
NOTE: Revenue Intelligence is available with the Business License Plan.
Using Revenue Insights Views
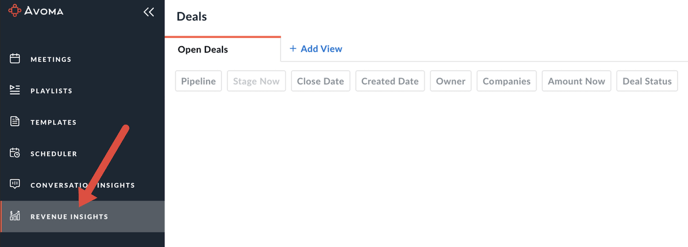
To get started, navigate to the Revenue Insights tab in the left hand navigation. When searching for information about your prospects and customers, you can see them through the standard views offered from Avoma or from user created views saved for future use.
Filters
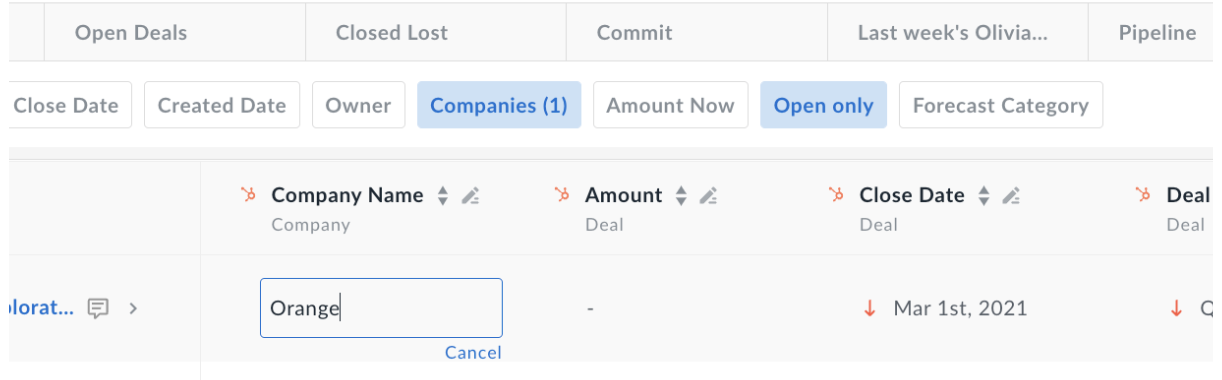
Each view can be modified using one of the multiple filters.
- Filter by Pipeline - Filter by the Sales pipeline type (Prospecting, Renewal, Trial, Expansion).
- Filter by the Stage Now - Using our sync with your CRM, you can filter by the different stages in your sales cycle. This can help you narrow down and just look at deals that are in "negotiating" or "waiting on customer."
- Filter by Close Date - Filter by the date that the deal was closed (Previous Month, Previous Quarter, This Month, Next Month, This quarter, Next Quarter, This Year, All Time).
- Filter by Created Date - Filter by the date that the deal was originally added to the CRM (Yesterday, Previous Week, Last 7 Days, Last 30 Days, Last 90 Days, Previous Month, Previous Quarter, Week to Date).
- Filter by Owner - Filter by the owner as listed in the CRM.
- Filter by Company - Search the CRM by name of company
- Filter by Amount - Filter by the minimum to maximum deal amount
- Filter by Deal Status - Filter by the status of the deal as it stands today (Open Only, Closed Won Only, Closed Lost Only, All)
How to Create Custom Views within the Deals tab
Avoma provides the opportunity to customize a view and save it as a view to be used at a later time.
- Navigate to the the Revenue Insights tab in the left hand navigation
- Use the top filters to create a view that matches your needs.

- Click Save As, then Save as a New View to create the Read only View.
- Name the View and choose the appropriate visibility for it.
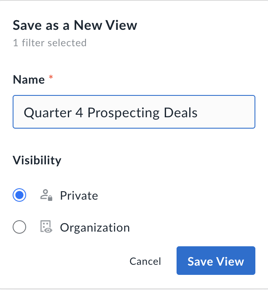
- Click Save View to finalize the Revenue Insight View.
NOTE:
- You can see all newly created views by navigating to the Revenue Insights tab in the left hand navigation.
- Any newly added Views will be automatically pinned to your dashboard.
- You can pin maximum of 20 Views on your dashboard.
- You can only delete views created by you.
- Based on your preference you can either DRAG or UNPIN Views.
- You can replicate any view and save it as your own view.
- The saved view includes any added or removed columns.
Adding columns to the Custom View
Avoma allows you to add additional columns of data to each custom view. You can add up to 50 columns between the CRM columns and Avoma columns within the view.
- CRM Columns. CRM columns are those which are available from the CRM , across Deal, Company, Opportunity, and Account (e.g., Deal Name, Amount, Stage, Close Date, etc.).
- Avoma Columns. Avoma columns are a set of predetermined columns which Avoma has deemed important to sales professionals across Comment, Custom Category, Email, Meeting, and Opportunity History (e.g., Comment Counts, Meetings done, Last Meeting Date, Custom Categories, etc.).
Avoma currently ships with the ability to add columns for:
- Hubspot: Deal and Company
- Salesforce: Opportunity and Account
The other available entities (Contact for Hubspot, Lead and Contact for Salesforce) would be made available soon, and are currently shown as Coming Soon.
Choosing Columns
- Click on the Selector button on the right hand side of the screen .

- Pick the Entity from which you would like to choose the column (from CRM or Avoma). The number numbers next to the Entity (#/##) are the ratio of how many properties have been selected over the total available.
- Select the property by toggling it to the on position (it will turn blue when it has been activated).
- Click Next.
- Modify the order of your Displayed Columns by dragging and dropping each column in order from left to right.
NOTE: You can choose/change columns for both the Default views and any custom views created.
Modify the order of your Displayed Columns by dragging and dropping each column in order from left to right.
NOTE: Both toggling and Un-toggling the column names in the chooser and Ordering the columns are an instantaneous action that is reflected immediately for the view.
For Admins only... To map fields from the CRM, (for Salesforce or Hubspot)... in app.avoma.com/settings/crm, click the Configure button.
Editable Fields within Revenue Intelligence.
 A dropdown popover is shown to select a value for the following field types.
- Select
- Radio
- Combobox
- Picklist
- Checkbox
- BooleanCheckbox
- Date
- Datetime
- Text
- Text area
- String
- Number
If you have any additional questions, please contact our team at help@avoma.com.