Follow these steps to set up every meeting for success.
1. Schedule your meetings with Avoma’s Scheduler
When you schedule a meeting with Avoma, you can make sure the Avoma bot joins automatically to handle recording, live transcription, and AI Notes.
How to do it:
To ensure Avoma records and transcribes your meeting, you can:
- Use the Avoma Scheduler to book calls that auto-add the Avoma Assistant.
- Use the browser extension to detect and join meetings instantly.
- Or simply add assistant@avoma.com as an attendee in any calendar invite.
Know more about Avoma Scheduling here.
2. Choose a note template for your upcoming meeting
Choosing the right template makes sure you capture consistent information every time.
- Go to your Upcoming Meetings and find your meeting.
- Click the Prepare for Meeting button.

- In the prep view, select the template you want to use and attach it to the meeting.

Once attached, your template will open automatically when the meeting starts.
3. Create a note template for your meetings
Avoma has a lot of default templates to choose from but you can create a customized one anytime to match your team’s process for different meeting types like discovery calls, demos, onboarding sessions, or customer check-ins.
- Go to Settings > Templates using Avoma’s sidebar or click here to open Templates directly.
- Click Create New Template.
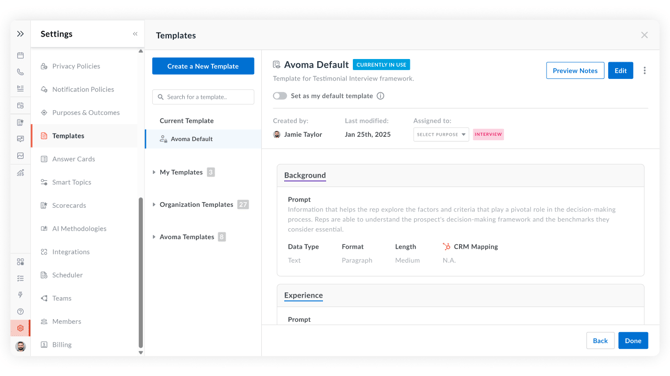
- Give your template a clear name, such as Demo Call Template or Interview Template.
- Add sections you want everyone to capture, for example :
- Agenda
- Key Questions
- Pain Points
- Objections
- Next Steps
- Arrange the sections in the order that works best for your team and click Save.
4. Connect your CRM
Connecting Avoma to your CRM automatically brings in details like contact information, account notes, and deal stages so you always have the latest context before your call.
To connect your CRM:
- In Avoma, click Settings > Integrations or click here.
- Find your CRM provider (Salesforce, HubSpot, Zoho, or Pipedrive).
- Click Connect and follow the steps to sign in and finish setup.
- Make sure your integration shows as connected before your next meeting.
Only users with Admin access can enable this integration.

Note: Make sure Automatic Recording is enabled for your meetings in Avoma so the Assistant joins and records as expected.
Here are more articles that will help you prep for the meeting better.